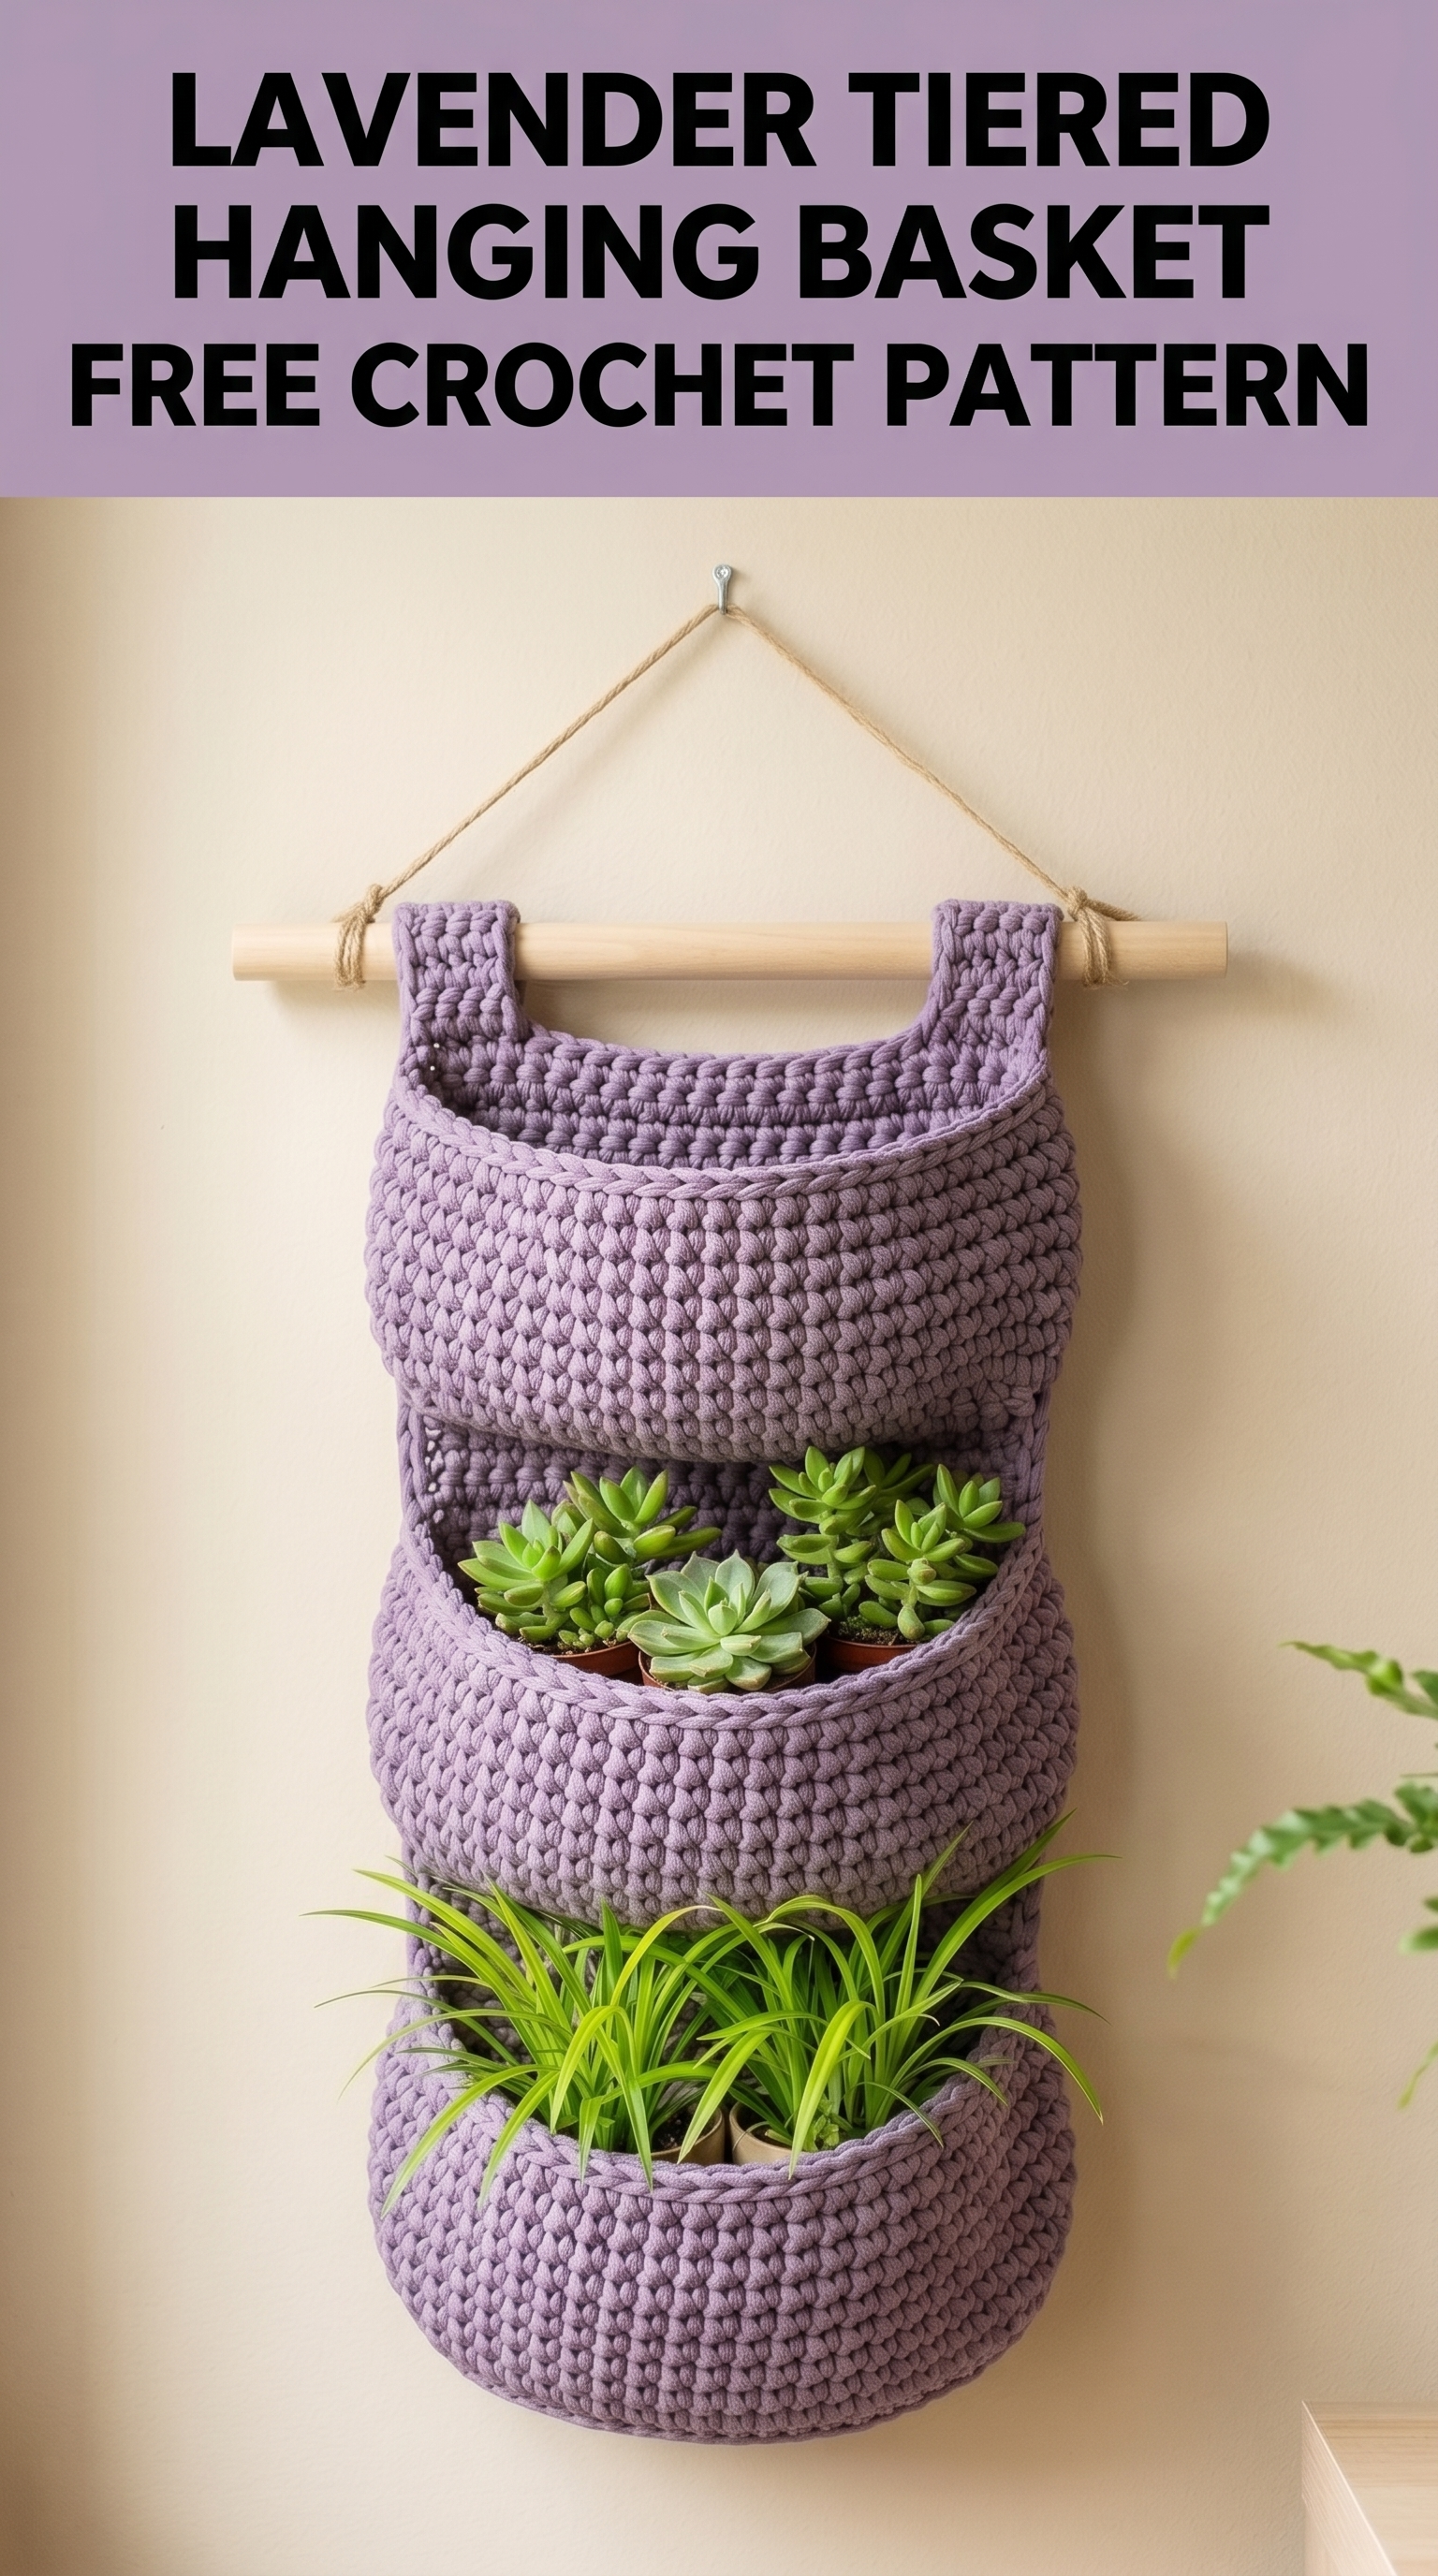
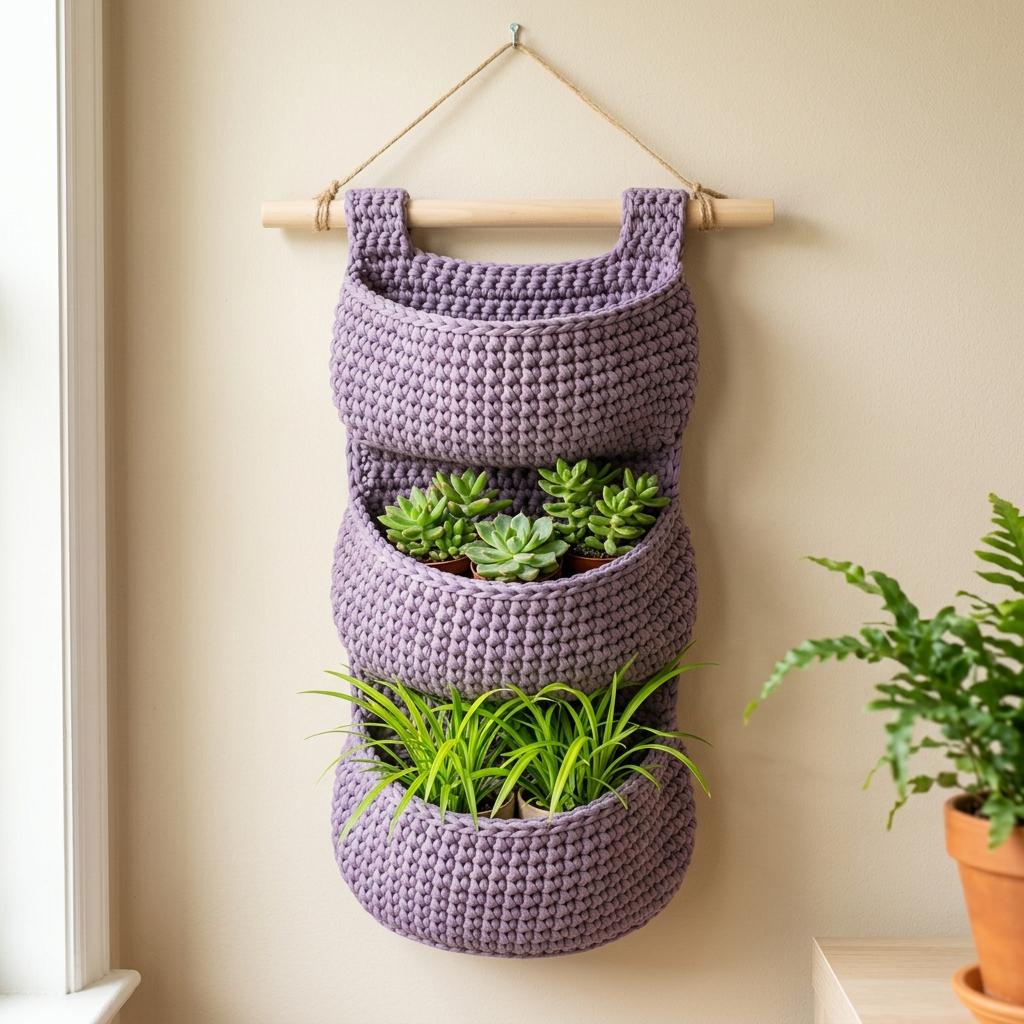
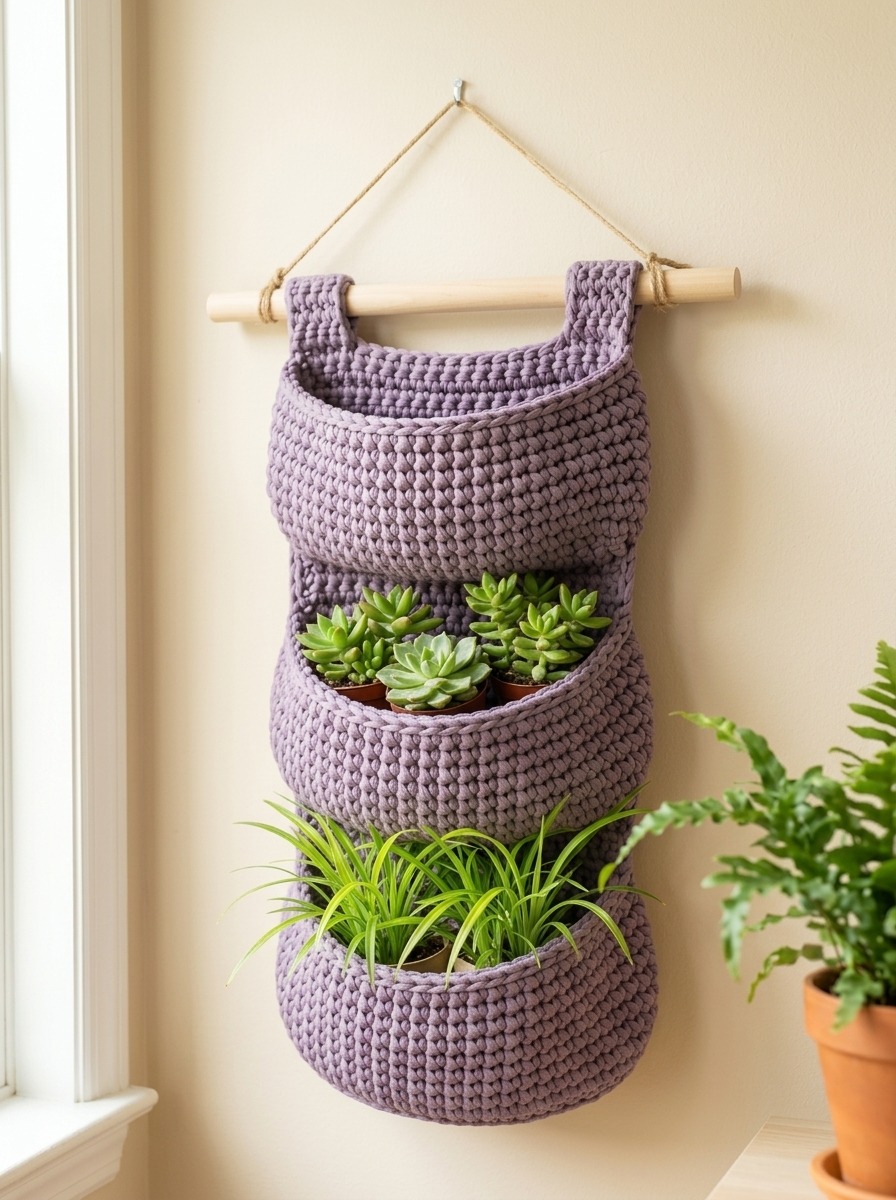
I absolutely love when a crochet project solves a real problem. This tiered hanging basket does exactly that. It turns an empty wall into a gorgeous vertical garden display while showing off your handmade skills. The soft lavender color gives it a modern boho feel that works in nearly any room.
This crochet pattern uses basic stitches worked in continuous rounds. If you can single crochet and work in the round, you can make this. I promise. The construction is simpler than it looks because each pocket is worked separately, then joined to a long backing panel. No complicated shaping required.
Let me walk you through everything you need to recreate this beautiful piece from scratch.
Why This Crochet Tutorial Works So Well
The tiered hanging basket design gives you three separate pockets stacked vertically. Each one is deep enough to hold a small potted plant, bathroom essentials, craft supplies, or whatever you need to corral. The wooden dowel at the top and jute hanger add that natural texture everyone loves right now.
What makes this crochet pattern beginner friendly is the repetition. You make the same pocket three times. By the third one, your hands will know exactly what to do. The backing strip is just straight rows. Nothing tricky there.
The finished piece hangs roughly 28 to 30 inches long and about 8 inches wide at the pockets. Perfect for a narrow wall space or beside a window where your plants can catch some light.
Materials You Will Need
Yarn:
Approximately 350 to 400 yards of bulky weight yarn (weight category 5). I recommend cotton or a cotton blend for structure. T-shirt yarn or macrame cord also works beautifully and gives that chunky modern look you see in the photo. The sample appears to use a recycled cotton cord in a dusty lavender shade.
Hook:
Size 6.0mm (J/10) or 6.5mm (K/10.5) crochet hook. Go up a size if you crochet tightly. You want a fabric that holds its shape but is not stiff as cardboard.
Notions:
Gauge and Finished Size
Gauge: 12 single crochet stitches and 14 rows equals 4 inches in single crochet worked flat.
Gauge matters here because it affects how sturdy your baskets are and whether they fit standard small plant pots. Too loose and the pockets will sag under weight. Too tight and you will fight every stitch.
Finished Dimensions:
Abbreviations and Stitch Definitions
Let me define every stitch before we start. Refer back here if you get confused.
ch — chain: Wrap yarn over hook, pull through loop on hook. This creates a foundation or adds height.
sl st — slip stitch: Insert hook, yarn over, pull through both the stitch and loop on hook in one motion. Used for joining or moving across stitches invisibly.
sc — single crochet: Insert hook into stitch, yarn over, pull up a loop (two loops on hook), yarn over, pull through both loops. This is your main stitch for the entire project.
sc2tog — single crochet two together (decrease): Insert hook into first stitch, pull up loop, insert hook into next stitch, pull up loop (three loops on hook), yarn over, pull through all three. This turns two stitches into one.
inc — increase: Work two single crochet stitches into the same stitch. This adds one stitch to your count.
BLO — back loop only: Instead of inserting your hook under both loops at the top of the stitch, go under only the back loop (the one farther from you). Creates a ridge on the front.
Step by Step Crochet Pattern
Pocket Base (Make 3)
Each pocket starts with an oval base worked in continuous rounds. Place your stitch marker at the beginning of each round and move it up as you go. Do not join rounds unless instructed.
Round 1: Ch 10. Sc in second ch from hook and in next 7 ch. Work 3 sc in last ch (this is the end of the oval). Rotate to work along the other side of the foundation chain. Sc in next 7 ch. Work 2 sc in last ch (same stitch as your first sc). (20 sts)
Round 2: Inc in first st, sc in next 7 sts, inc in next 3 sts, sc in next 7 sts, inc in next 2 sts. (26 sts)
Round 3: Sc in first st, inc in next st, sc in next 7 sts, (sc in next st, inc in next st) 3 times, sc in next 7 sts, (sc in next st, inc in next st) 2 times. (32 sts)
Round 4: Sc in next 2 sts, inc in next st, sc in next 7 sts, (sc in next 2 sts, inc in next st) 3 times, sc in next 7 sts, (sc in next 2 sts, inc in next st) 2 times. (38 sts)
Your oval base should measure approximately 2 inches wide by 5 inches long. If it looks right, you are on track. If it is curling up at the edges, your tension may be too tight.
Pocket Sides
Now we build the walls straight up from the base.
Round 5: Working in BLO for this round only, sc in each st around. (38 sts)
This back loop only round creates that nice ridge at the bottom where the base meets the sides. It also helps the base lie flat.
Rounds 6 through 16: Sc in each st around. (38 sts)
That gives you 11 rounds of sides, which should measure about 4 to 5 inches tall. Your pocket should now hold its shape and stand upright on a table.
Pocket Opening Shaping
The front of each pocket dips down lower than the back. This makes it easier to see and access what is inside. We achieve this by working partial rows.
Row 17: Sc in next 12 sts, turn. Leave remaining stitches unworked. (12 sts)
Row 18: Ch 1, sc2tog, sc in next 8 sts, sc2tog, turn. (10 sts)
Row 19: Ch 1, sc2tog, sc in next 6 sts, sc2tog, turn. (8 sts)
Row 20: Ch 1, sc in each st across. (8 sts)
Fasten off and weave in ends. The dipped front creates that lovely curved opening visible in the photo.
Repeat this entire pocket pattern two more times so you have three identical pockets.
Backing Panel
The backing strip connects all three pockets and provides the loops for the dowel.
Row 1: Ch 11. Sc in second ch from hook and in each ch across, turn. (10 sts)
Rows 2 through 90: Ch 1, sc in each st across, turn. (10 sts)
Your backing panel should measure approximately 4 inches wide and 26 inches long. Adjust row count if needed based on your gauge.
Fasten off, leaving a long tail for sewing.
Dowel Loops (Make 2)
These small tabs create a channel for your wooden dowel.
Row 1: Ch 7. Sc in second ch from hook and in each ch across, turn. (6 sts)
Rows 2 through 4: Ch 1, sc in each st across, turn. (6 sts)
Fasten off, leaving a long tail.
Assembly Instructions
Lay your backing panel flat on a table. Position your three pockets evenly spaced along the panel. The top of the first pocket should sit about 4 inches from the top edge of the backing. Leave approximately 2 inches between each pocket.
Attaching pockets: Using your yarn needle and matching yarn, whipstitch the back edge of each pocket to the backing panel. Stitch through both layers securely. The pockets attach only at the back, so the sides remain open and the structure stays dimensional.
Adding dowel loops: Fold each small tab in half to create a loop. Position one loop at each top corner of the backing panel, about half an inch from the edges. Whipstitch securely in place. The loops should face the same direction, creating a channel for the dowel.
Inserting dowel: Slide your wooden dowel through both loops. Center it so equal amounts extend on each side.
Creating hanger: Cut your jute twine to desired length. Tie each end securely around the dowel near the loops. Your hanging length depends on your ceiling height and where you want the baskets to sit.
Helpful Tips for Success
Yarn choice matters. Cotton and cotton blends hold their shape better than acrylic for this project. The slight stiffness helps the pockets stay open. If you only have acrylic, try going down one hook size.
Blocking is optional but helpful. Wet your finished pockets and stuff them with plastic bags or tissue paper while they dry. This helps them hold that rounded shape permanently.
For heavy items, reinforce the backing. You can whipstitch a piece of stiff interfacing or plastic canvas to the wrong side of the backing panel before attaching pockets.
Plants need protection. If using for live plants, place them in plastic pots with saucers to catch water. The yarn will absorb moisture and could get moldy if constantly wet.
Alternative Uses for Your Tiered Hanging Basket
This pattern is not just for plants. I have seen crafters use similar designs for bathroom storage, holding rolled towels and toiletries. It works beautifully in an entryway for mittens, sunglasses, and keys. Nurseries love these for diaper supplies or small toys. Your craft room could use one for yarn cakes or notion storage.
The possibilities are truly endless. Make it in different colors to match each room.
You Did It
Thank you so much for trusting me with your time and yarn. I hope this crochet pattern gives you exactly what you pictured. There is something so satisfying about filling those handmade pockets with beautiful plants or treasured items.
If you make this tiered hanging basket, I would absolutely love to see it. Tag me on Instagram or share in our Facebook group. Seeing your finished projects genuinely makes my whole week.
Happy crocheting, friend. You have got this.
