There’s something about making fruit amigurumi that just feels happy. And this Tropical Mango Couple might be the cutest project sitting on my craft table right now. Two plump little mangoes with gradient coloring, sweet kawaii faces, tiny feet, and one wearing an adorable flower headpiece. If you’ve made a basic amigurumi before, you can absolutely handle this crochet pattern.
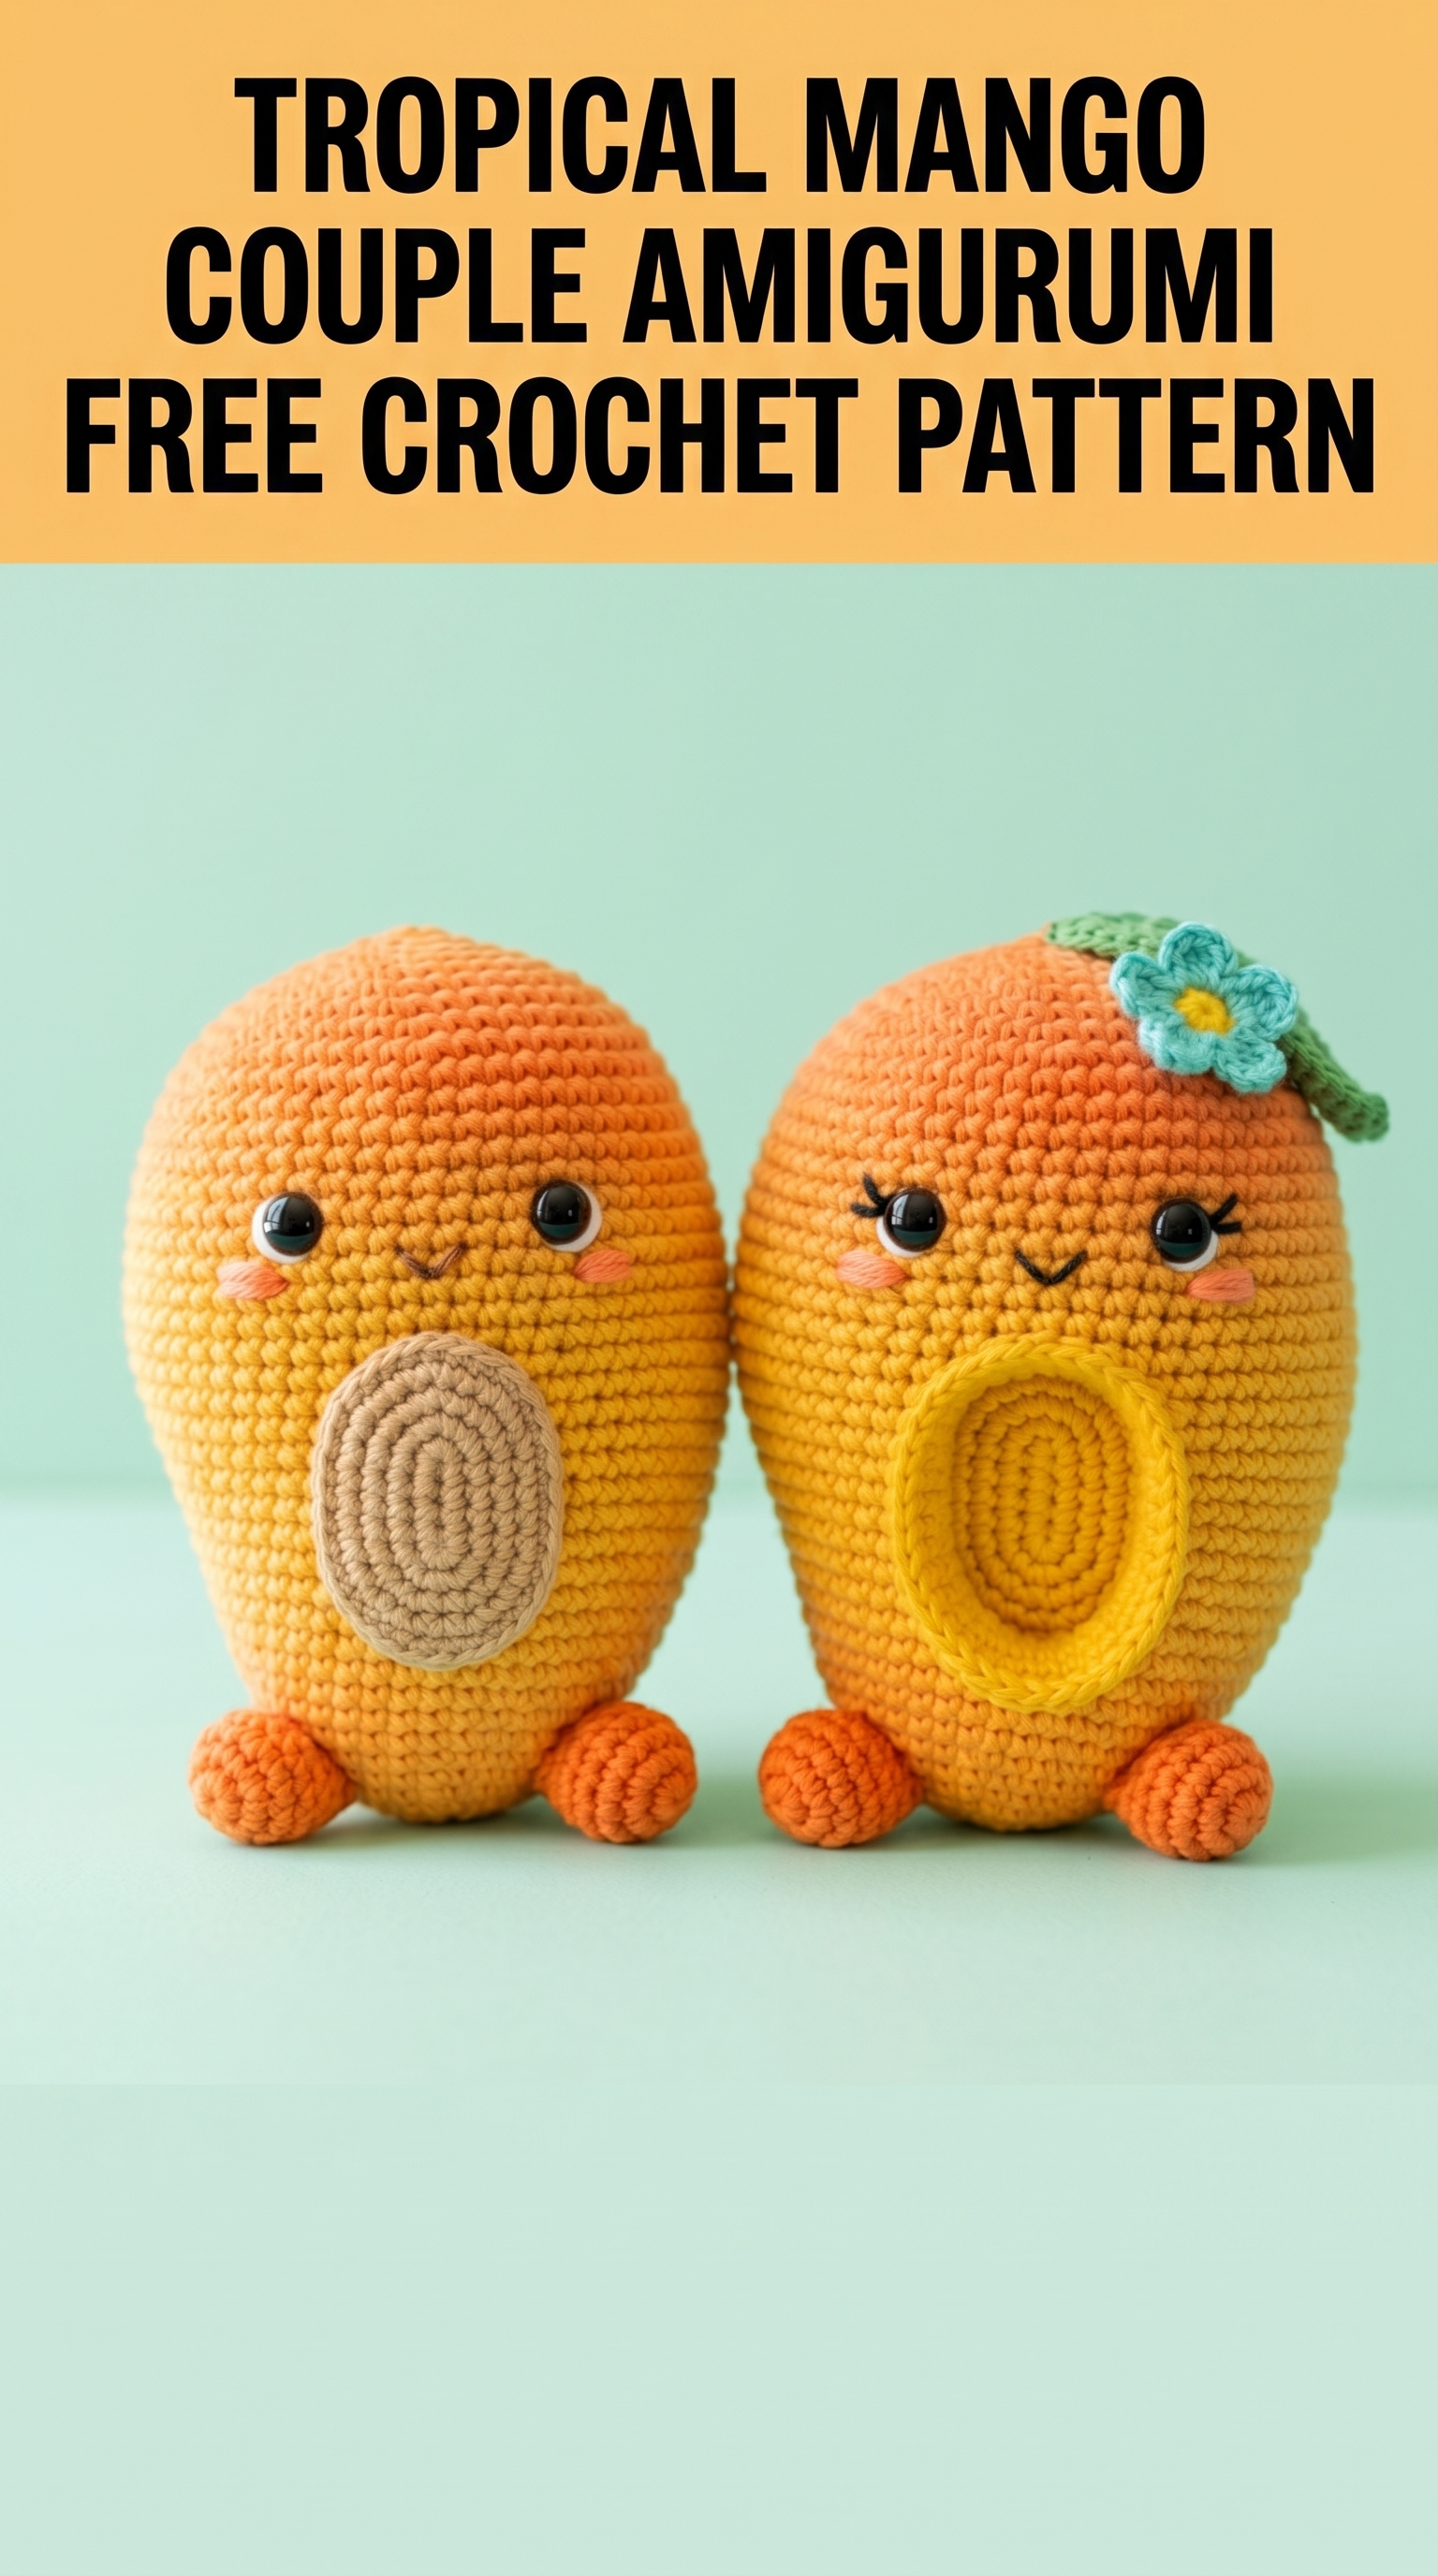
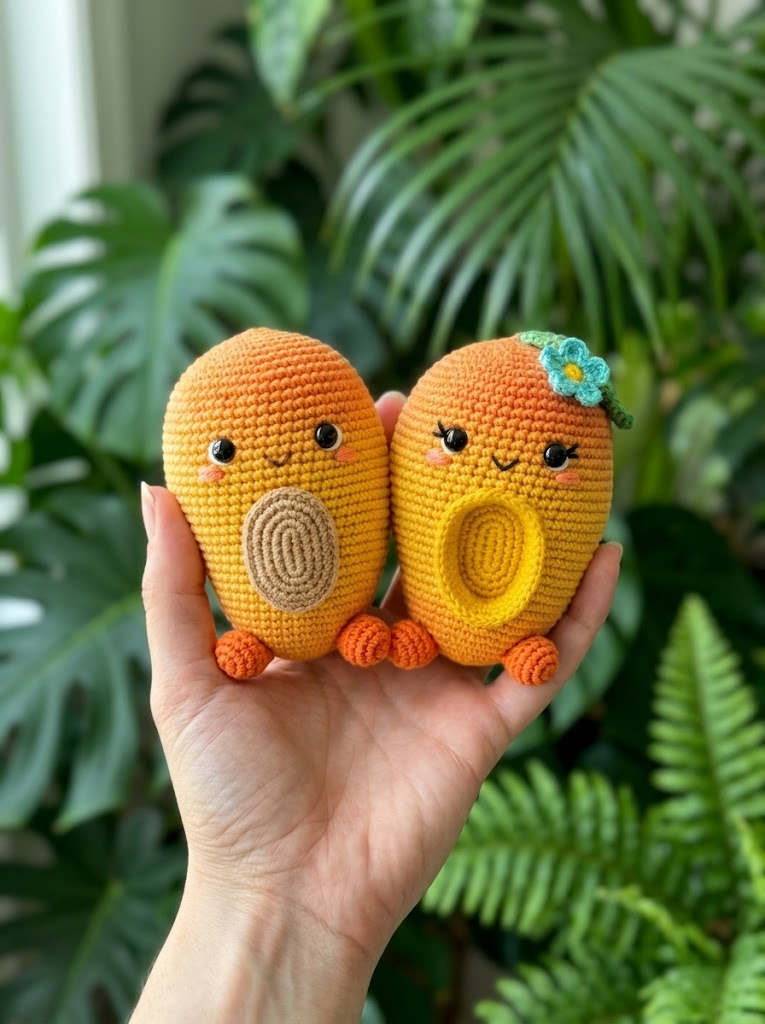
These mangoes stand about 5 inches tall when finished. They work up surprisingly quick since you’re using basic single crochet throughout. The gradient effect looks impressive but it’s actually just changing yarn colors at strategic points. No fancy color work required.
Let me walk you through everything you need to recreate this tropical mango couple from start to finish.
Why You’ll Love This Mango Amigurumi Pattern
This crochet tutorial gives you two complete mangoes with slightly different personalities. One has a neutral tan pit showing. The other has a golden yellow pit with a sweet little flower and leaf on top. They make an adorable pair for summer decor, a gift for fruit lovers, or a fun addition to a play food collection.
The construction is beginner friendly if you understand basic amigurumi techniques. You’ll work in continuous rounds, do simple increases and decreases, and sew pieces together at the end. Nothing scary here.
Materials You’ll Need
Yarn:
I recommend worsted weight yarn (also called medium weight or #4) in acrylic or cotton. Something like Red Heart Super Saver, Caron Simply Soft, or Paintbox Yarns Cotton works beautifully. You’ll need small amounts of each color. This is a great stash buster project.
Hook:
Using a smaller hook than recommended for your yarn creates a tight fabric. This prevents stuffing from showing through. Essential for amigurumi.
Other Supplies:
Stitches and Abbreviations
Let me define every stitch before we start. Read through these so nothing surprises you mid-project.
Magic Ring (MR): An adjustable starting loop that closes completely with no hole. You’ll work your first round of stitches into this ring, then pull the tail to close it tight. If magic rings frustrate you, chain 2 and work your stitches into the first chain instead.
Chain (ch): The foundation stitch. Yarn over, pull through the loop on your hook. Creates one chain.
Single Crochet (sc): Insert hook into stitch, yarn over and pull up a loop (2 loops on hook), yarn over and pull through both loops. One single crochet complete.
Increase (inc): Work 2 single crochet stitches into the same stitch. This adds one stitch to your count.
Invisible Decrease (inv dec): Insert hook through front loops only of the next 2 stitches, yarn over and pull through both front loops (2 loops on hook), yarn over and pull through both. This creates a tighter, less visible decrease than the standard method. Really makes a difference in amigurumi.
Slip Stitch (sl st): Insert hook into stitch, yarn over and pull through both the stitch and the loop on your hook in one motion. Used to join or finish.
Front Loop Only (FLO): Work into only the front loop of the stitch instead of both loops.
Gauge Note
Exact gauge isn’t critical for amigurumi since size can vary. What matters is a tight fabric. If you can see gaps between your stitches or stuffing peeks through, go down a hook size. Your finished mango should feel firm and dense.
Mango Body Pattern (Make 2)
The body is worked from the bottom up in continuous rounds. Don’t join rounds. Use a stitch marker to track your first stitch of each round. Move the marker up as you go.
Starting with Golden Yellow:
Round 1: MR, 6 sc into ring, pull tight. (6 sts)
Round 2: Inc in each st around. (12 sts)
Round 3: *Sc 1, inc* repeat around. (18 sts)
Round 4: *Sc 2, inc* repeat around. (24 sts)
Round 5: *Sc 3, inc* repeat around. (30 sts)
Round 6: *Sc 4, inc* repeat around. (36 sts)
Round 7: *Sc 5, inc* repeat around. (42 sts)
Round 8: *Sc 6, inc* repeat around. (48 sts)
Rounds 9-14: Sc in each st around. (48 sts) — 6 rounds even
Change to Orange yarn at Round 15. To change colors cleanly, complete the last stitch of Round 14 but stop before the final yarn over. Yarn over with orange instead and pull through. Continue with orange.
Rounds 15-20: Sc in each st around. (48 sts) — 6 rounds even
Round 21: *Sc 6, inv dec* repeat around. (42 sts)
Round 22: *Sc 5, inv dec* repeat around. (36 sts)
Round 23: *Sc 4, inv dec* repeat around. (30 sts)
Insert safety eyes between Rounds 18-19, approximately 8-10 stitches apart. Push the post through from outside, secure with washer on inside. Make sure placement looks good before continuing. You won’t be able to remove them once the washer snaps on.
Round 24: *Sc 3, inv dec* repeat around. (24 sts)
Begin stuffing firmly. Add more as you close up.
Round 25: *Sc 2, inv dec* repeat around. (18 sts)
Round 26: *Sc 1, inv dec* repeat around. (12 sts)
Round 27: Inv dec around. (6 sts)
Fasten off, leaving a tail. Thread through remaining 6 stitches, pull tight to close. Weave in end.
Pit/Belly Patch (Make 2)
One mango has a tan pit, the other has a golden yellow pit with a darker yellow outline. I’ll give you the basic flat oval, then explain how to add the border for the second version.
Basic Pit (Tan version):
Round 1: MR, 6 sc into ring. (6 sts)
Round 2: Inc in each st around. (12 sts)
Round 3: *Sc 1, inc* repeat around. (18 sts)
Round 4: *Sc 2, inc* repeat around. (24 sts)
Round 5: *Sc 3, inc* repeat around. (30 sts)
Round 6: Working in FLO only, sc in each st around. (30 sts)
Sl st to first st, fasten off leaving a long tail for sewing.
Bordered Pit (Yellow version):
Work Rounds 1-5 in golden yellow as above. (30 sts)
Round 6: Change to bright/darker yellow. Working in FLO only, sc in each st around. (30 sts)
Sl st, fasten off with long tail.
The front loop round creates a raised ridge that gives depth to the pit. It’s subtle but you can see it in the finished piece.
Feet (Make 4)
Each mango needs 2 feet. Work in bright orange.
Round 1: MR, 6 sc into ring. (6 sts)
Round 2: Inc in each st around. (12 sts)
Rounds 3-6: Sc in each st around. (12 sts) — 4 rounds
Stuff lightly. Flatten opening and sc through both layers to close (6 sc across). Fasten off with tail for sewing.
Flower (Make 1)
For the girly mango’s headpiece. Work in aqua/teal.
Round 1: MR, 5 sc into ring. (5 sts)
Round 2: *Ch 3, sl st in same st, sl st in next st* repeat around. (5 petals)
Fasten off. Switch to yellow, sew a few stitches through center to create the yellow flower middle. Weave in ends.
Leaf (Make 1)
Work in green.
Ch 7.
Row 1: Starting in 2nd ch from hook: sl st, sc, hdc, dc, hdc, sc.
This creates a pointed leaf shape. Fasten off with tail for attaching.
Assembly Instructions
Take your time here. Placement makes all the difference in how your finished mangoes look.
Attaching the Pit:
Position the pit patch on the lower front of the mango body, centered and sitting where the yellow meets the orange. Pin in place if helpful. Using the long tail, whip stitch around the edge to secure. The raised ridge from the FLO round should face outward.
Attaching the Feet:
Position both feet at the bottom front of each mango. They should point slightly outward, like the mango is sitting with feet splayed. Sew securely using the tail from closing.
Embroidering the Face:
Using pink yarn or embroidery floss, create small oval cheeks on either side of the face, below and slightly outside the eyes. Use satin stitch (straight stitches side by side filling the shape).
For the mango with eyelashes, use black embroidery floss to add 3 small straight stitches above the outer corner of each eye.
The smile is a simple curved line in black between and below the eyes. Use backstitch for a clean line.
Adding the Flower (one mango only):
Position the flower on top of the head, slightly to one side. Sew through the center to secure. Attach the leaf tucked under or beside the flower. A few stitches through the base holds it in place.
Tips for Success
Stuffing: Firm but not rock hard. You want the mango to hold its shape and stand upright. The bottom should be flat enough to sit without rolling.
Color changes: For the cleanest transition, complete the last yarn over of the previous color with the new color. Weave in ends as you go rather than leaving them all for the end.
Safety eyes: Triple check placement before snapping on the washer backing. Hold the mango at arm’s length to see if the face looks balanced. Adjust if needed.
Sewing pieces: Use the same color yarn as the piece you’re attaching. Whip stitch works great for flat pieces like the pit. Ladder stitch creates invisible joins for 3D pieces.
How to Customize Your Mango Couple
Want to make these your own? Here are some ideas.
Use different gradient colors for fantasy fruit vibes. Pinks and corals look gorgeous. Try green to yellow for an unripe mango look.
Add blush with actual makeup or chalk pastels instead of embroidered cheeks.
Skip the flower and add a tiny crocheted hat or bow instead.
Make a whole tropical fruit collection. These would look adorable with avocado, pineapple, and papaya friends.
Final Thoughts on This Tropical Mango Amigurumi Crochet Pattern
I really hope you enjoy making this tropical mango couple as much as I enjoyed designing them. There’s something so satisfying about watching these little characters come to life, especially when you finish that face and they suddenly have personality.
This step by step crochet pattern gives you everything to recreate both mangoes exactly as shown. But don’t stress about perfection. Handmade means unique, and your mangoes will be perfect because you made them.
Thank you so much for trusting me with your crafting time. It genuinely means the world.
If you make this pattern, I’d absolutely love to see your finished mangoes. Tag me on Instagram or share in my Facebook group. Seeing your creations is the best part of sharing patterns.
Happy crocheting, friend. Now go make some adorable fruit.
