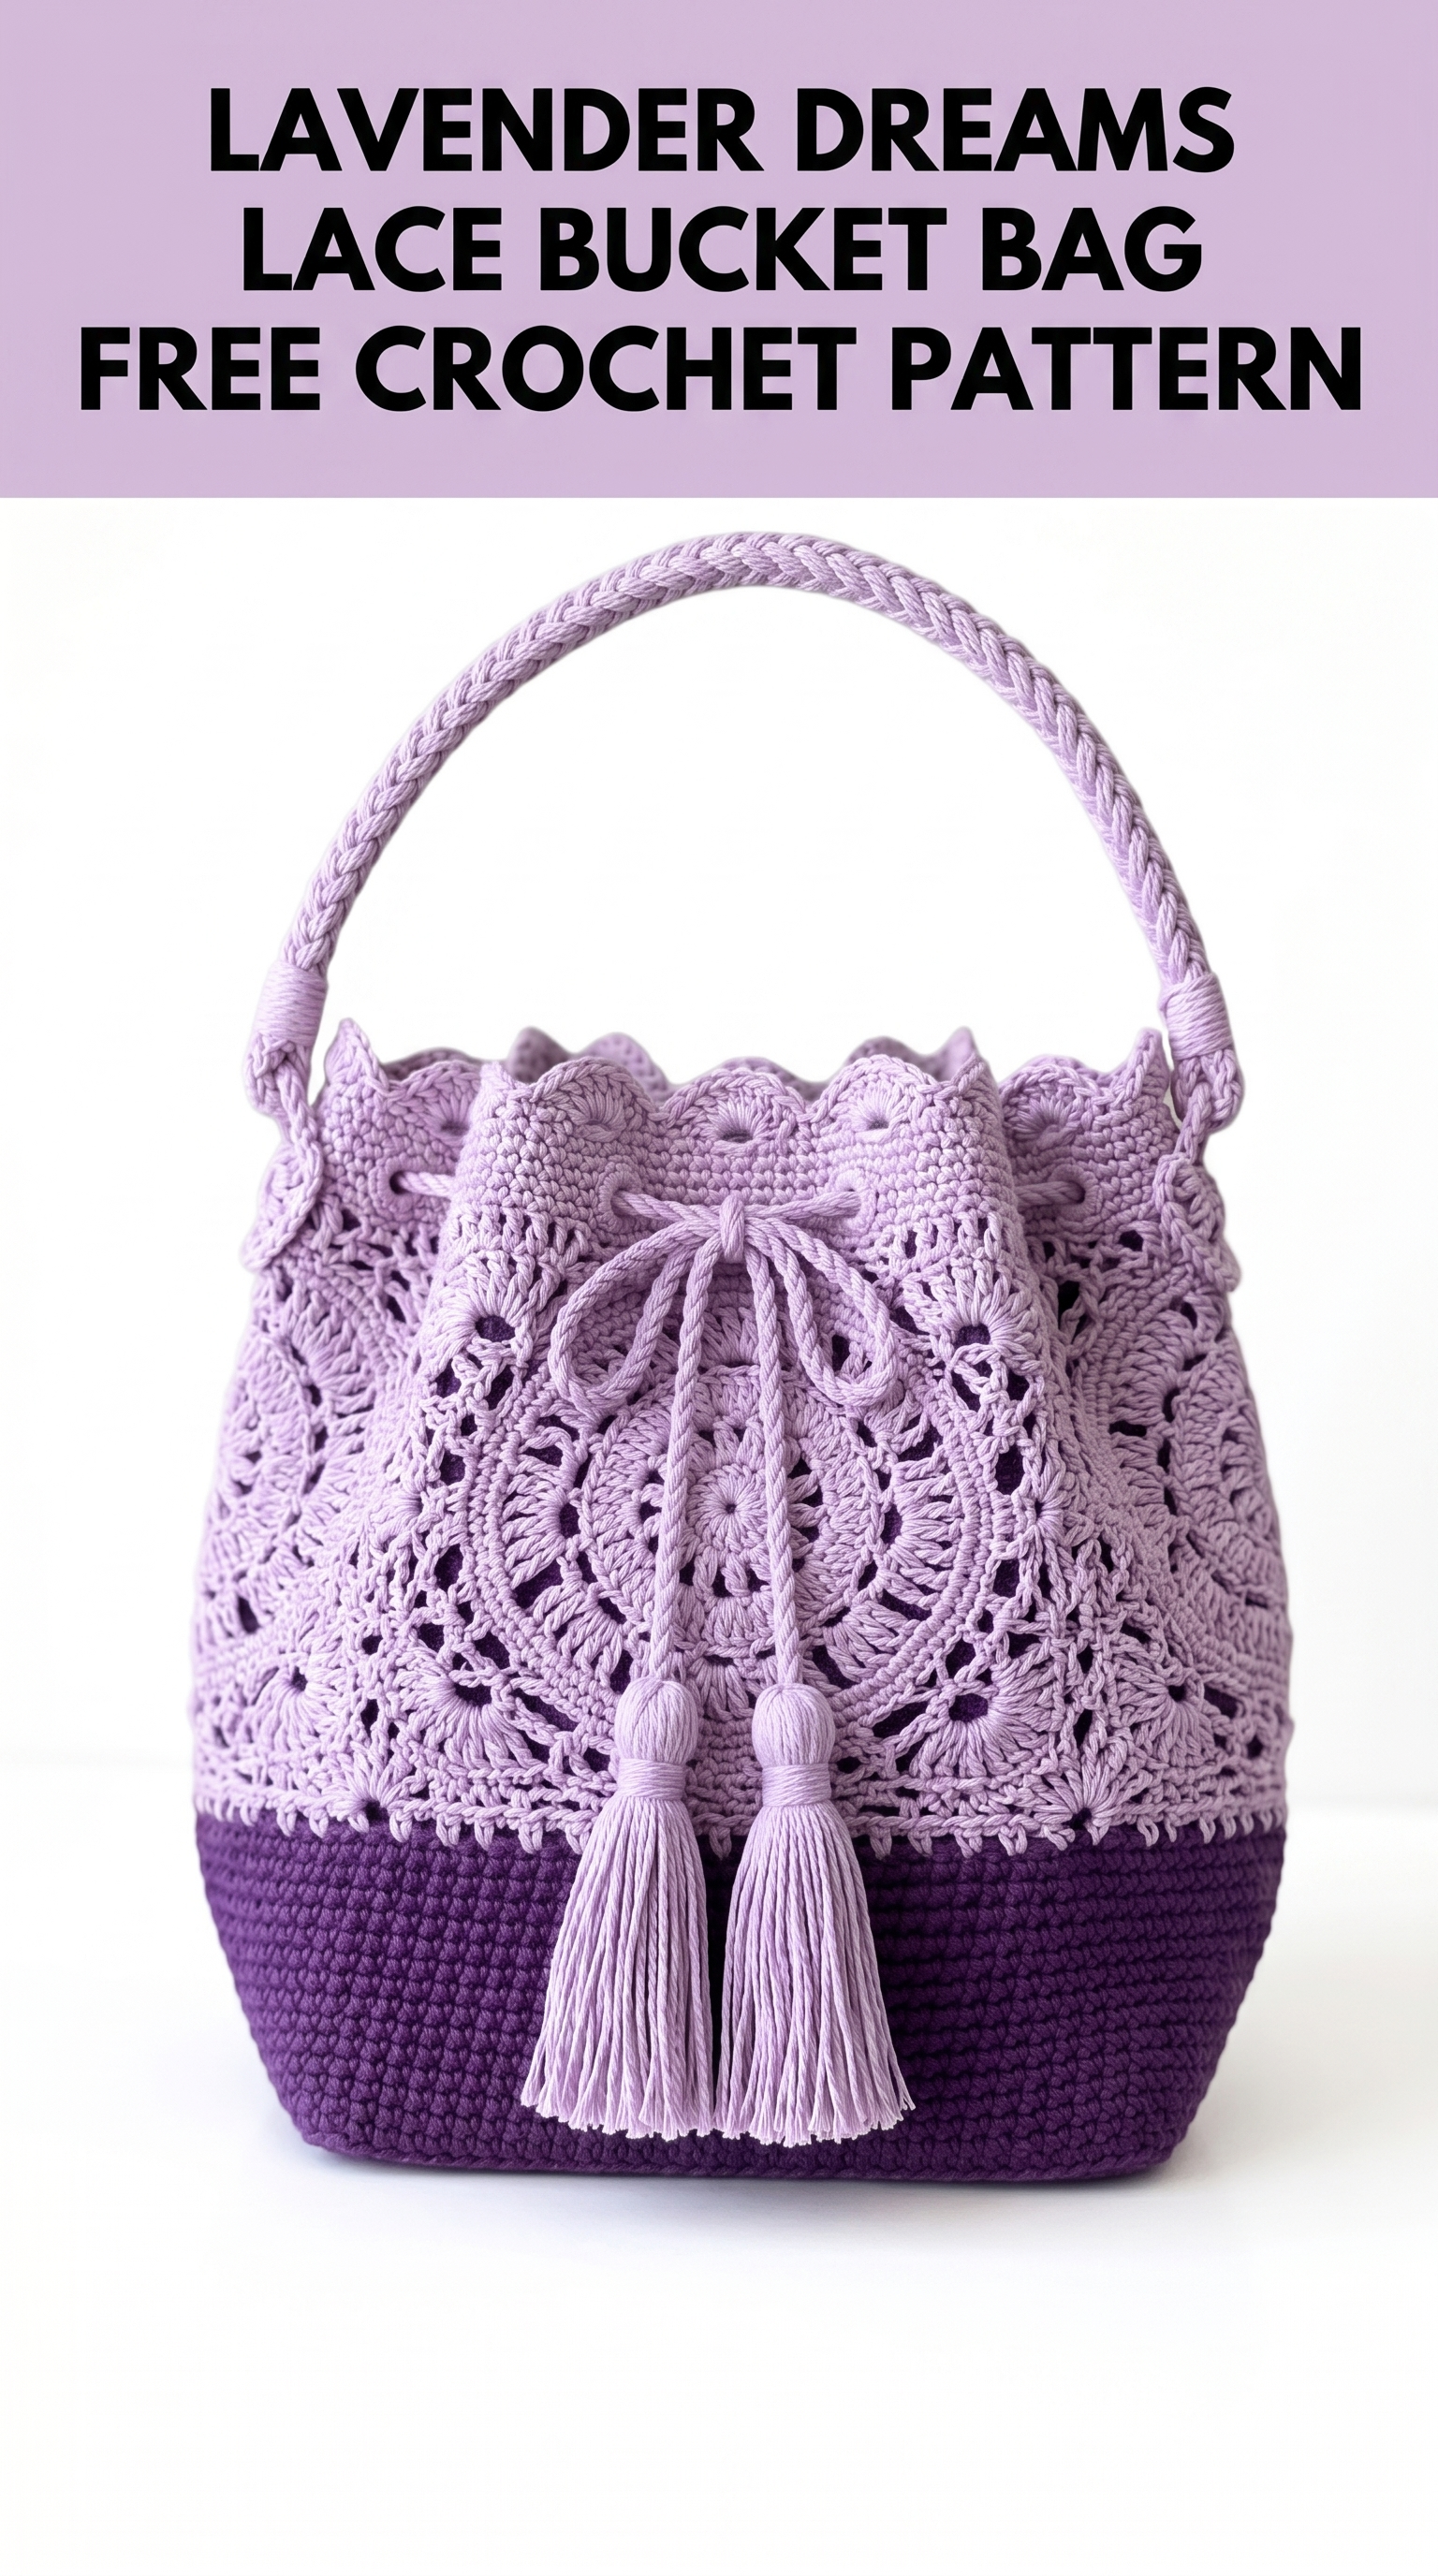
There’s something truly magical about a handmade bag that looks like it belongs in a boutique window. This Lavender Dreams Lace Bucket Bag is exactly that kind of project. It combines a sturdy solid base with an absolutely stunning lace overlay that will have everyone asking where you bought it.
I designed this crochet pattern to be achievable for confident beginners and satisfying for experienced crocheters looking for a weekend project that actually goes somewhere. The two-tone construction means you get visual interest without complicated colorwork. And those tassels? Pure finishing perfection.
Let me walk you through every single step to create this beautiful bucket bag from scratch.
Why This Lace Bucket Bag Crochet Pattern Works
This bag succeeds because of its smart construction. The bottom half uses tight single crochet (sc) stitches in a deep purple cotton that creates structure and durability. The top half features an intricate lace pattern in soft lavender that looks complex but builds from basic stitches you probably already know.
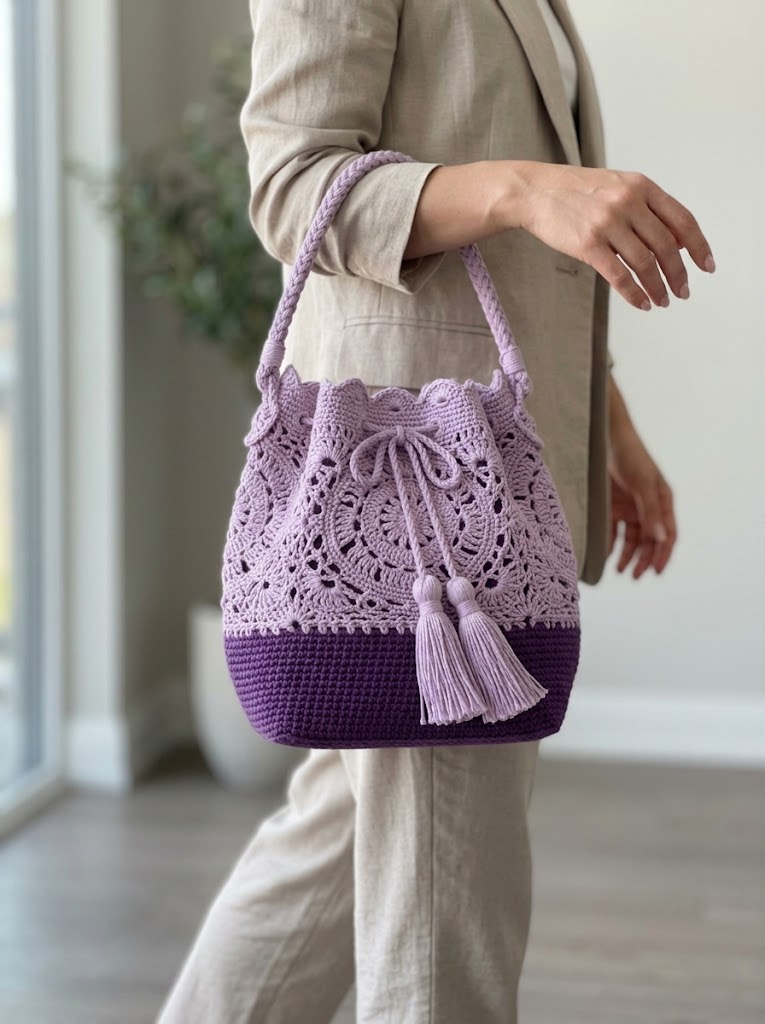
The drawstring closure keeps your belongings secure. The braided handle sits comfortably on your shoulder or in your hand. And those matching tassels add a polished designer touch.
Finished Dimensions: Approximately 10 inches tall by 8 inches wide at the base, expanding to about 11 inches at the widest point of the lace section.
Materials You Will Need
Gathering your supplies before starting makes the entire process smoother. Here is everything required for this crochet bucket bag pattern:
Yarn:
I recommend 100% mercerized cotton for this project. The sheen enhances the lace pattern beautifully, and cotton holds its shape better than acrylic for bags. Brands like Scheepjes Catona, DMC Natura, or Lion Brand 24/7 Cotton work wonderfully.
Hook:
Notions:
Skill Level and Techniques Used
This pattern is intermediate level. You should feel comfortable with:
If you have made a granny square or any lace doily, you have the skills for this lace bucket bag. The motifs in the upper section look intricate but repeat predictably once you complete the first pattern round.
Abbreviations and Stitch Definitions
Let me define every stitch before we begin. This way you can reference back anytime you feel uncertain.
ch = Chain: Yarn over, pull through loop on hook. Creates foundation or spacing.
sl st = Slip stitch: Insert hook, yarn over, pull through both loops at once. Used for joining.
sc = Single crochet: Insert hook, yarn over and pull up a loop (2 loops on hook), yarn over and pull through both loops. Creates a short, tight stitch.
hdc = Half double crochet: Yarn over, insert hook, pull up a loop (3 loops on hook), yarn over and pull through all 3 loops. Slightly taller than sc.
dc = Double crochet: Yarn over, insert hook, pull up a loop (3 loops on hook), yarn over and pull through 2 loops, yarn over and pull through remaining 2 loops. The workhorse of lace patterns.
tr = Treble crochet: Yarn over twice, insert hook, pull up a loop (4 loops on hook), yarn over and pull through 2 loops three times. Creates tall, elegant stitches.
inc = Increase: Work 2 stitches into the same stitch. Expands your work.
ch-sp = Chain space: The gap created by chains in previous rows. You work into this space, not into individual chains.
sk = Skip: Pass over the indicated number of stitches without working into them.
The Pattern: Step by Step Crochet Tutorial

Part 1: The Base (Color A, Deep Purple)
The base is a simple flat circle worked in continuous rounds. Use your smaller hook here if you have one. Tighter stitches mean a sturdier bottom.
Magic Ring: Create a magic ring (also called magic circle or adjustable ring). This is the foundation for a closed center.
Round 1: Work 6 sc into the magic ring. Pull the tail to close the center tightly. Place a stitch marker in the first stitch. (6 sts)
Round 2: Work 2 sc in each stitch around. (12 sts)
Round 3: *Sc in next st, 2 sc in next st* repeat around. (18 sts)
Round 4: *Sc in next 2 sts, 2 sc in next st* repeat around. (24 sts)
Round 5: *Sc in next 3 sts, 2 sc in next st* repeat around. (30 sts)
Round 6: *Sc in next 4 sts, 2 sc in next st* repeat around. (36 sts)
Round 7: *Sc in next 5 sts, 2 sc in next st* repeat around. (42 sts)
Round 8: *Sc in next 6 sts, 2 sc in next st* repeat around. (48 sts)
Round 9: *Sc in next 7 sts, 2 sc in next st* repeat around. (54 sts)
Round 10: *Sc in next 8 sts, 2 sc in next st* repeat around. (60 sts)
Round 11: *Sc in next 9 sts, 2 sc in next st* repeat around. (66 sts)
Round 12: *Sc in next 10 sts, 2 sc in next st* repeat around. (72 sts)
Your base should measure approximately 5 inches across. If it is smaller, continue the increase pattern. If larger, stop one round earlier.
Part 2: The Solid Body Section (Color A, Deep Purple)
Now we build the walls. Stop increasing and work straight up.
Rounds 13 through 32: Sc in each stitch around. Do not increase. (72 sts per round)
This creates 20 rounds of solid fabric approximately 4 inches tall. The bag walls should stand upright on their own. If your fabric feels floppy, your tension might be too loose. Consider dropping down a hook size.
After completing Round 32, slip stitch to join. Fasten off Color A and weave in the tail.
Part 3: The Lace Overlay Section (Color B, Soft Lavender)
This is where the magic happens. Switch to your larger hook (3.5mm) for this section. The lace needs a bit more drape than the base.
Joining Round: Attach Color B with a standing sc in any stitch. Sc in each st around. Sl st to first sc to join. (72 sts)
Round 1 (Foundation for Lace): Ch 3 (counts as first dc), dc in each st around. Sl st to top of ch-3 to join. (72 dc)
Round 2 (Creating Arch Spaces): Ch 5 (counts as dc plus ch-2), sk 2 sts, dc in next st, *ch 2, sk 2 sts, dc in next st* repeat around. Sl st to 3rd ch of beginning ch-5. (24 ch-2 spaces)
Round 3 (Building the Lace): Sl st into first ch-2 space. Ch 3, 2 dc in same space, ch 1, *3 dc in next ch-2 space, ch 1* repeat around. Sl st to top of ch-3. (24 shell groups)
Round 4 (Fan Development): Ch 3, dc in same st, dc in next dc, 2 dc in next dc (this creates a 5-dc fan at the shell top), ch 2, *2 dc in first dc of next shell, dc in center dc, 2 dc in last dc of shell, ch 2* repeat around. Sl st to join. (24 fans)
Round 5 (Connecting Fans): Ch 1, sc in first 2 dc, *ch 3, dc in ch-2 space, ch 3, sk 1 dc, sc in next 3 dc* repeat around, adjusting final repeat. Sl st to join.
Rounds 6 through 10: Continue building the lace motif by alternating shell rounds with connecting chain arch rounds. Follow this rhythm:
The lace naturally expands as you progress. This is intentional. It creates the bucket bag’s signature silhouette.
Round 11 (Floral Motif Round): This round creates the flower-like medallions visible in the design. Work clusters of dc stitches fanning out from a central point, then connect with chains. The pattern: *7 dc fan in one space, ch 3, sc in next space, ch 3* creates petal shapes.
Rounds 12 through 15: Continue the established lace pattern, maintaining the floral motifs while building height.
Part 4: The Drawstring Channel
Round 16: Ch 4 (counts as dc plus ch-1), sk 1 st, dc in next st, *ch 1, sk 1 st, dc in next st* repeat around. Sl st to 3rd ch of beginning ch-4. This creates the eyelets for your drawstring.
Round 17: Ch 1, sc in each dc and ch-1 space around. Sl st to join. (72 sts)
Part 5: The Scalloped Edge
Final Round: *Sk 1 st, 5 dc in next st (scallop made), sk 1 st, sl st in next st* repeat around. Fasten off and weave in ends.
This creates the beautiful wavy edge you see at the top of the bag.
Finishing Details
The Braided Handle
Cut 9 strands of Color B yarn, each approximately 60 inches long. Divide into 3 groups of 3 strands each. Secure one end and braid tightly. The finished braid should measure about 14 to 16 inches.
Attach each end of the braid to opposite sides of the bag at the drawstring round. Stitch securely with matching yarn and a tapestry needle. Wrap the attachment point with additional yarn to create a neat finished look.
The Drawstring Cord
Chain approximately 100 stitches with Color B. Sl st back through each chain to create a sturdy cord. Or create a simple twisted cord by cutting 4 strands 80 inches long, twisting tightly, then folding in half and allowing them to twist together.
Thread the drawstring through the eyelet round, entering and exiting at center front.
The Tassels
For each tassel, wrap Color B yarn around a 4 inch piece of cardboard approximately 40 times. Cut along one edge. Tie a separate strand tightly around the middle. Fold in half. Wrap another strand about half an inch from the top to create the tassel head. Trim ends evenly.
Attach one tassel to each end of the drawstring cord.
Tips for Success with This Crochet Pattern
Blocking matters. After completing the lace section, lightly steam block or wet block the bag over a bowl or balloon. This opens up the lace beautifully and evens out your stitches.
Check your gauge. The solid base should be tight enough that you cannot easily see light through it. The lace section should be open and draping.
Consider a liner. If you plan to carry small items, sew a simple fabric liner into the bag. This prevents things from poking through the lace holes.
Substitute carefully. Stick with cotton or cotton blend yarns. Acrylic stretches under weight and may cause the bag to lose its shape over time.
Making This Pattern Your Own
This lace bucket bag invites customization. Try different color combinations. Navy and white creates a nautical feel. Coral and cream feels beachy. All one color in natural cotton makes it earthy and versatile.
You can also adjust the height by adding or removing rounds in either section. Need a taller bag? Add more solid rounds at the base. Want more drama? Extend the lace section.
You Did It
Thank you so much for choosing this pattern for your next project. I genuinely hope you love making this Lavender Dreams Lace Bucket Bag as much as I loved designing it. There is something deeply satisfying about watching lace emerge from your hook, and carrying a handmade bag that stops people in their tracks.
I would absolutely love to see your finished bucket bag. Share your photos on Instagram or Facebook and tag me so I can celebrate with you. Seeing your creations makes my whole week brighter.
Happy crocheting, friend. You have got this.
