
A crochet granny square blanket is a patchwork of motifs joined into one generous throw, and each square carries a little bit of the maker’s time and patience into the finished piece.
The Crochet Granny Square Blanket
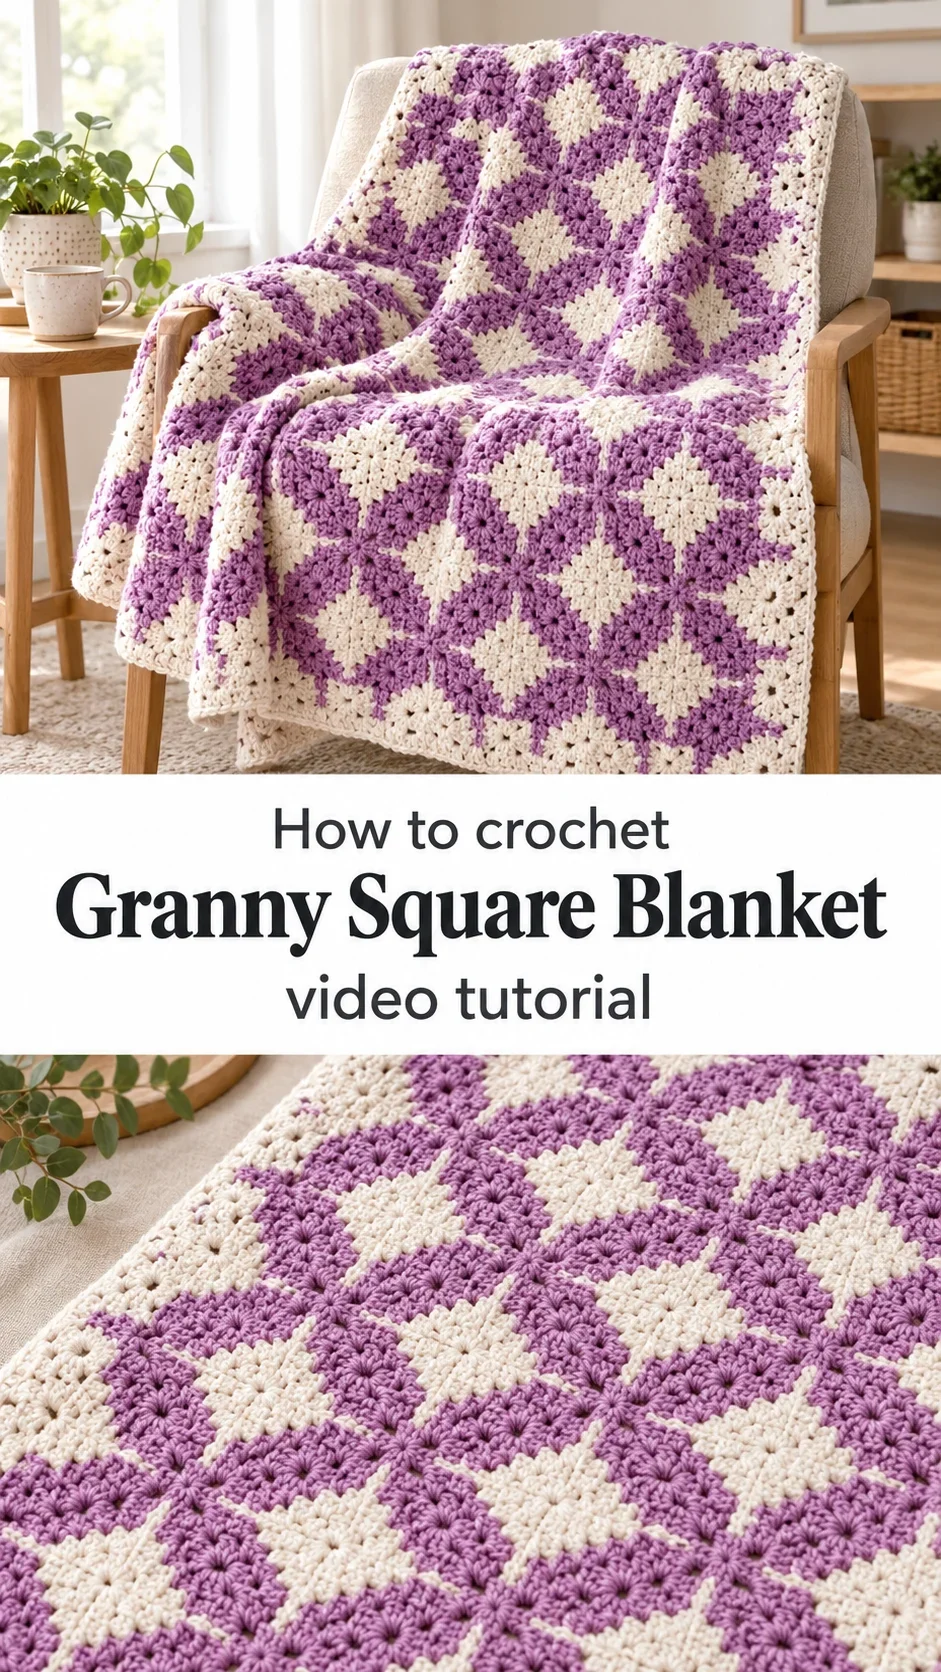
The granny square blanket is built from individual squares, each worked from the centre outward, then joined edge to edge until the whole throw takes shape. What sets this particular design apart is its star-like motif: a bold purple centre that radiates into points, set against crisp cream corner spaces that frame each square. Where the pale ground and the lilac star meet, the square reads almost like a mosaic tile. The result is a throw that looks graphic and modern in one light and soft and nostalgic in another. It will sit happily across the arm of a sofa, drape over a bed, or wrap around shoulders on a cool evening. Its open corner spaces also let the piece breathe, so it suits warm rooms as well as cold ones.
Making a blanket one square at a time keeps the project manageable. You can work on it in the evenings, carry a few squares to a café, or set it aside and return to it months later without losing your place. Because every square is identical, the rhythm settles quickly, and each finished motif gives a clear sense of progress. The video tutorial below walks through the square itself, so you can focus on the stitches before worrying about the full blanket.
Square Blanket Related Posts:
- Crochet Striped Blanket: A Timeless Handmade Treasure
- Crochet Minion Plush: A Whimsical and Huggable Companion
- Crochet Border Lace: A Delicate and Timeless Trim
- Crochet Origami Bag: A Chic and Versatile Accessory
Materials
A soft, mid-weight cotton or cotton-blend yarn is the right choice for this design. The two colours should be close in weight so the stitches sit evenly across the square. Cotton holds the crisp edges of the star and keeps the cream corners bright, while a fuzzy or stretchy fibre would blur the points and make the motifs look uneven. Choose a light, neutral ground colour and a single lilac or purple accent, since the contrast is what makes the motif stand out. You will need a hook sized to the yarn label, typically somewhere in the 3 to 4 mm range for a standard cotton, and a tapestry needle for weaving in ends and joining the squares. Stitch markers help keep track of the square’s corners, and a pair of scissors is useful for trimming ends. If you plan a large throw, buy all your yarn from the same dye lot to avoid subtle colour shifts between squares. Keep a little extra of each colour aside for the border.
Understanding the Square Structure
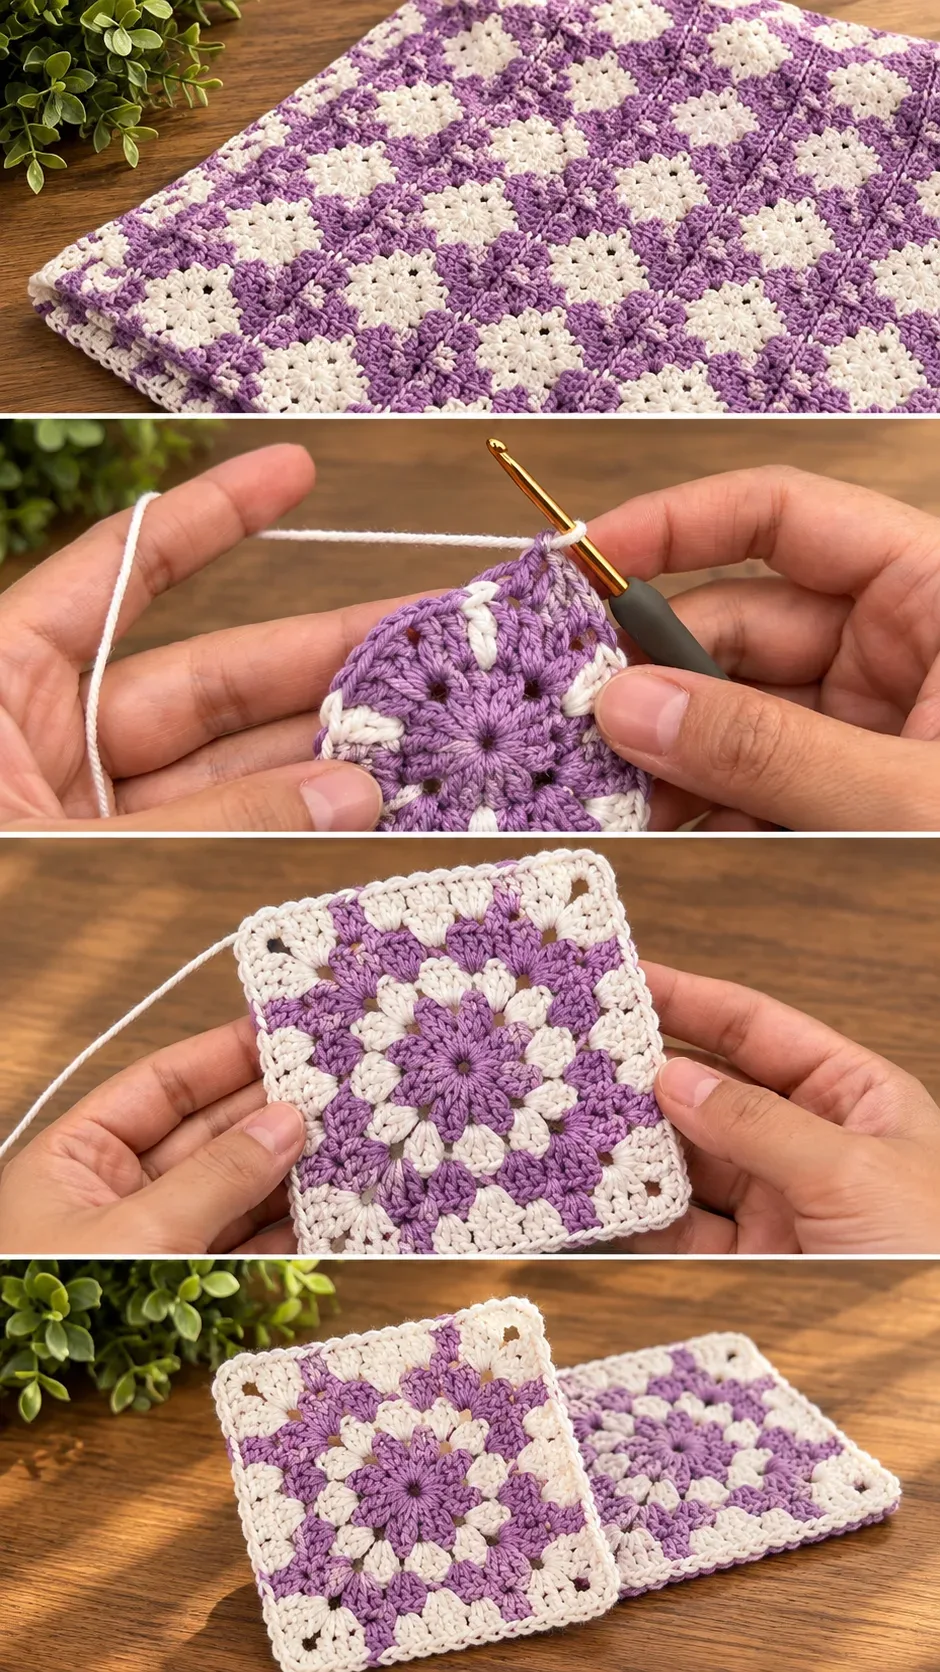
Each square begins at a small centre ring and grows outward in rounds. The star points come from the purple sections, and the cream areas fill the corners between them. Because the colours change within a round, the carry-over of yarn between blocks of colour is what gives the square its clean outline. Pay attention to where each colour begins and ends, since that is where the square takes its shape. The corners are worked as separate spaces, which is why they look like little open windows in the finished piece.
Why the Corners Matter
The cream corner spaces do more than add contrast. They are the points where squares will join, so they also set the spacing and the drape of the whole blanket. Work each corner with the same tension as the rest of the square, or the joins will pull and the blanket will ripple.
Choosing Yarn and Colour
Cotton is the most reliable choice for this motif. It keeps stitch definition sharp, resists stretching, and washes well. A cotton-acrylic blend is a practical alternative if you want something softer to the touch and a little more affordable, though it will show less crispness at the points. Avoid very slippery mercerised yarns for a first attempt, because they can split under the hook and make the colour changes harder to control. For colour, the lilac in the reference is a soft, dusty purple that keeps the throw calm. A deeper plum would make the star more dramatic, while a sage or dusty blue would give a cooler, quieter feel. Keep the cream neutral and slightly warm so it does not look stark against the purple.
Skill Level and Techniques
This is an intermediate project. You should be comfortable with colour changes, carrying yarn across the back of a square, and working consistently in rounds. The most patient part is keeping every square the same size, since small differences add up across a full blanket. Take time to check each square against the first one before you join anything.
Joining the Squares and Keeping Edges Straight
Joining is where the blanket comes together, and it deserves unhurried attention. Lay out your squares first to check the colour arrangement. If your edges start to bow, your tension is probably uneven, so loosen up on the join stitches or swap to a slightly larger hook for the seam. If the blanket ripples at the edges, block each square before joining. Blocking relaxes the fabric and evens out the star points so they line up cleanly.
If the Squares Are Different Sizes
Do not force mismatched squares together. Re-block the smaller ones gently, or add an extra round of cream to bring them up to size. A small difference is much easier to fix before joining than afterwards.
How to Style Your Blanket
The blanket looks most at home in the setting shown in the photos: a warm wooden surface with a sprig of green in the background, where the cream and lilac read as calm and natural. Drape it across a sofa arm, fold it over the foot of a bed, or hang it over a chair in a reading corner. For a more styled look, pair it with cream or grey linens and a few lilac or sage cushions. The open corners let light through, so it also works well layered over a plain throw on a sunny windowsill.
Tips for a Smooth Finish
Weave in every end as you go rather than leaving them until the end, since a pile of loose tails is tiring and easy to lose track of. Block the finished blanket by pinning it to size and steaming lightly, which evens out the squares and helps the star points sit crisply. Use the same hook for the border as for the squares so the edge does not pull in. A simple single-crochet border in cream will frame the throw neatly.
Caring for Your Granny Square Blanket
Wash the blanket in cool water on a gentle cycle, and lay it flat to dry so the squares keep their shape. Avoid hot water and high heat, which can shrink cotton and distort the motifs. Store it folded loosely rather than hung, since hanging can stretch the top edge over time.
Following the Video Tutorial
Watch the tutorial closely at the point where the colours change within a round. That is the moment most makers pause, and the creator’s hand position shows exactly how to carry the yarn without pulling. Pause and replay as often as you need, especially for the corner spaces. Work one square fully before starting the next, and compare it with the video to confirm your tension and shape.
A Timeless Handmade Heirloom
A granny square blanket is a project you can return to for years. Its colours will soften with use, its squares will carry the rhythm of the evenings you spent making them, and its bright cream and lilac will keep their charm long after the last end is woven in. Take your time with the joins and the blocking, and the finished throw will feel like it was always meant to be part of your home.
Credit: Video tutorial by the creator of the original granny square pattern, available at the link below.
[Video tutorial: Crochet Granny Square Blanket]
Follow us on Pinterest and subscribe to the Newsletter so you don’t miss a thing!
Tutorial and photos of this granny square blanket by: Knitting time🧶by Dina.
