
I am so genuinely excited to share this Crochet Origami Bag tutorial with you, because it stopped me mid-scroll the moment I saw it. The way a flat crocheted rectangle folds and seams itself into this sculptural, structured shoulder bag feels almost like magic every single time.
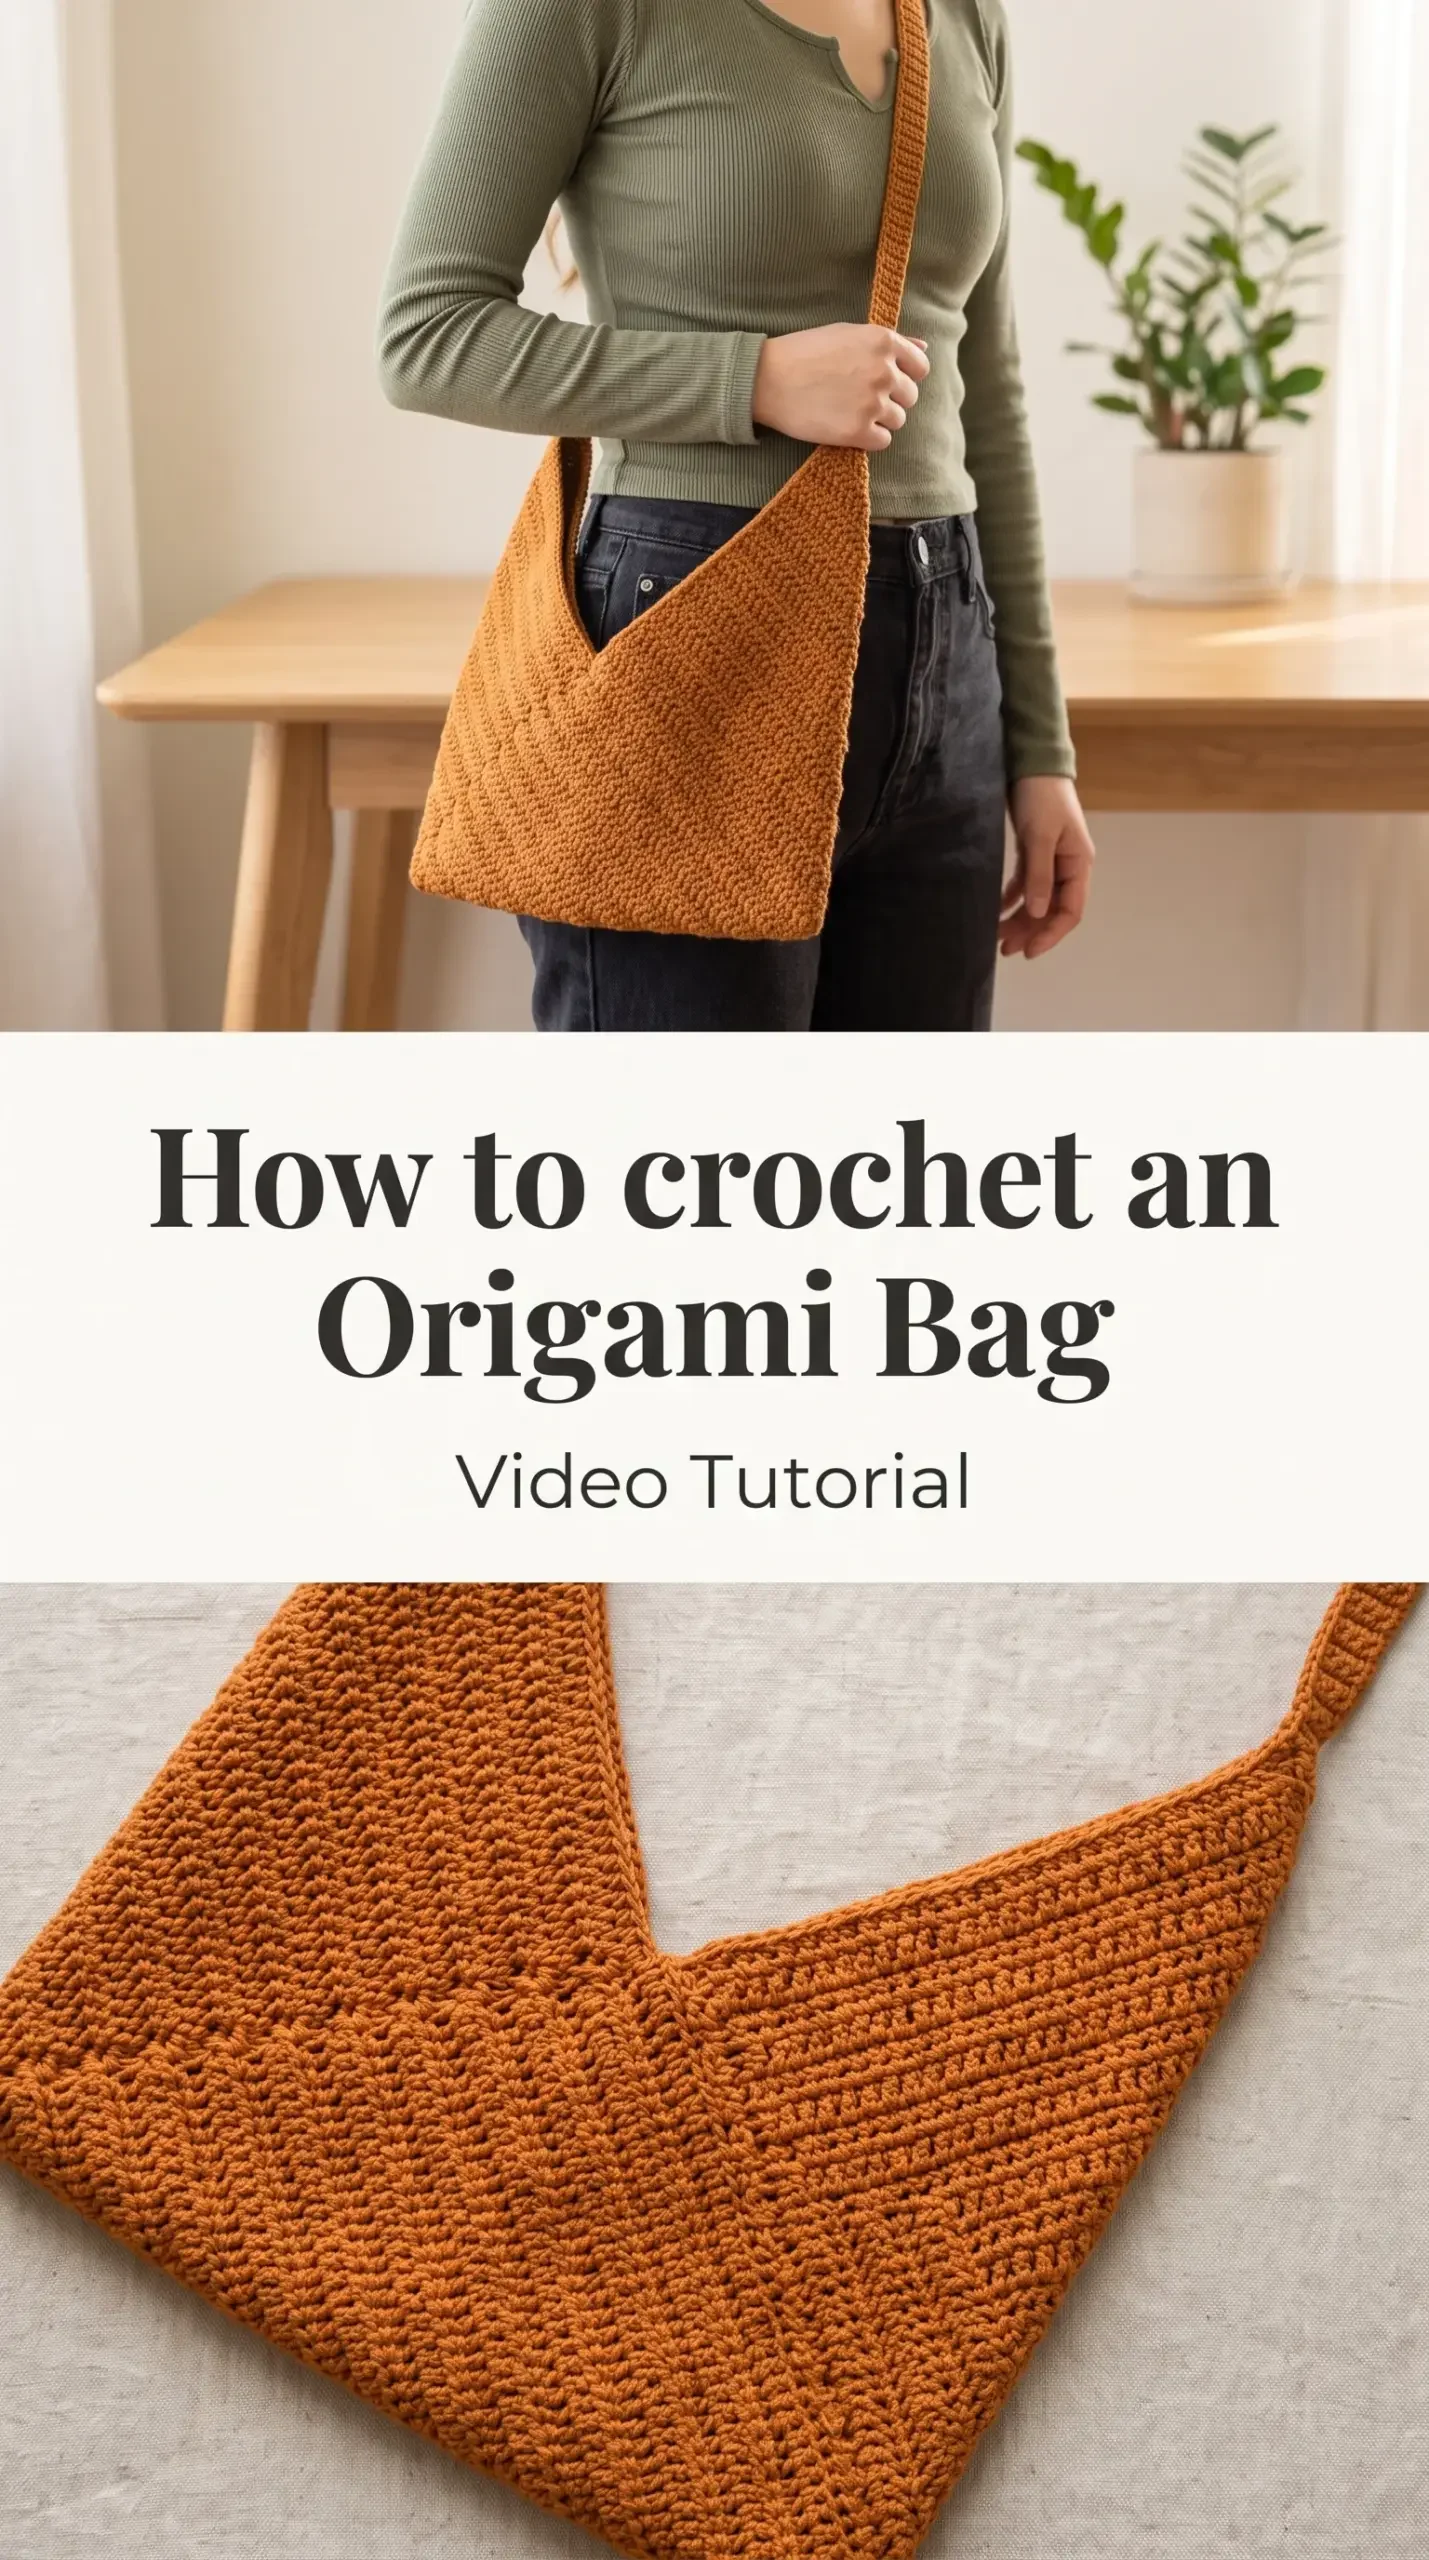
The Origami Bag
The Crochet Origami Bag is one of those rare projects that looks far more complex than it actually is, which makes finishing it feel like the most satisfying thing you have done all week. It carries a quiet architectural elegance, the kind of bag that sits on your shoulder with purpose and a whisper of effortlessness. The warm amber and mustard tones you see here give it an autumnal richness, but the silhouette works just as beautifully in cream, slate, or deep forest green. It is made for the person who wants their handmade accessories to look intentional, polished, and deeply personal.
Origami Bag Related Posts:
- Crochet Tunisian Dishcloth: A Charming Kitchen Essential
- Crochet Puffy Valentine Heart: A Sweet Handmade Treasure
- Crochet Petal Stitch Fabric: A Delicate Floral Masterpiece
- Crochet Emoji Ball: A Fun and Playful Handmade Toy
For color, think burnt caramel, terracotta, oat, or ink navy. A single solid color lets the texture of the stitches do all the speaking, while a heathered or tweed yarn adds depth without competing with the bag’s clean folds. This is one of those pieces you will find yourself pairing with everything from a linen dress in July to an oversized coat in November.
Materials and Tools
For this Crochet Origami Bag, a worsted weight cotton or cotton-blend yarn is the ideal choice. Cotton gives the bag its body and structure, so the origami folds hold their shape beautifully rather than drooping over time. You will want to work with a 5mm crochet hook, which gives a firm but not stiff fabric at this weight. A yarn needle for seaming and a pair of small scissors are the only other tools you truly need, and keeping your yarn needle handy throughout the build makes the finishing steps feel seamless.
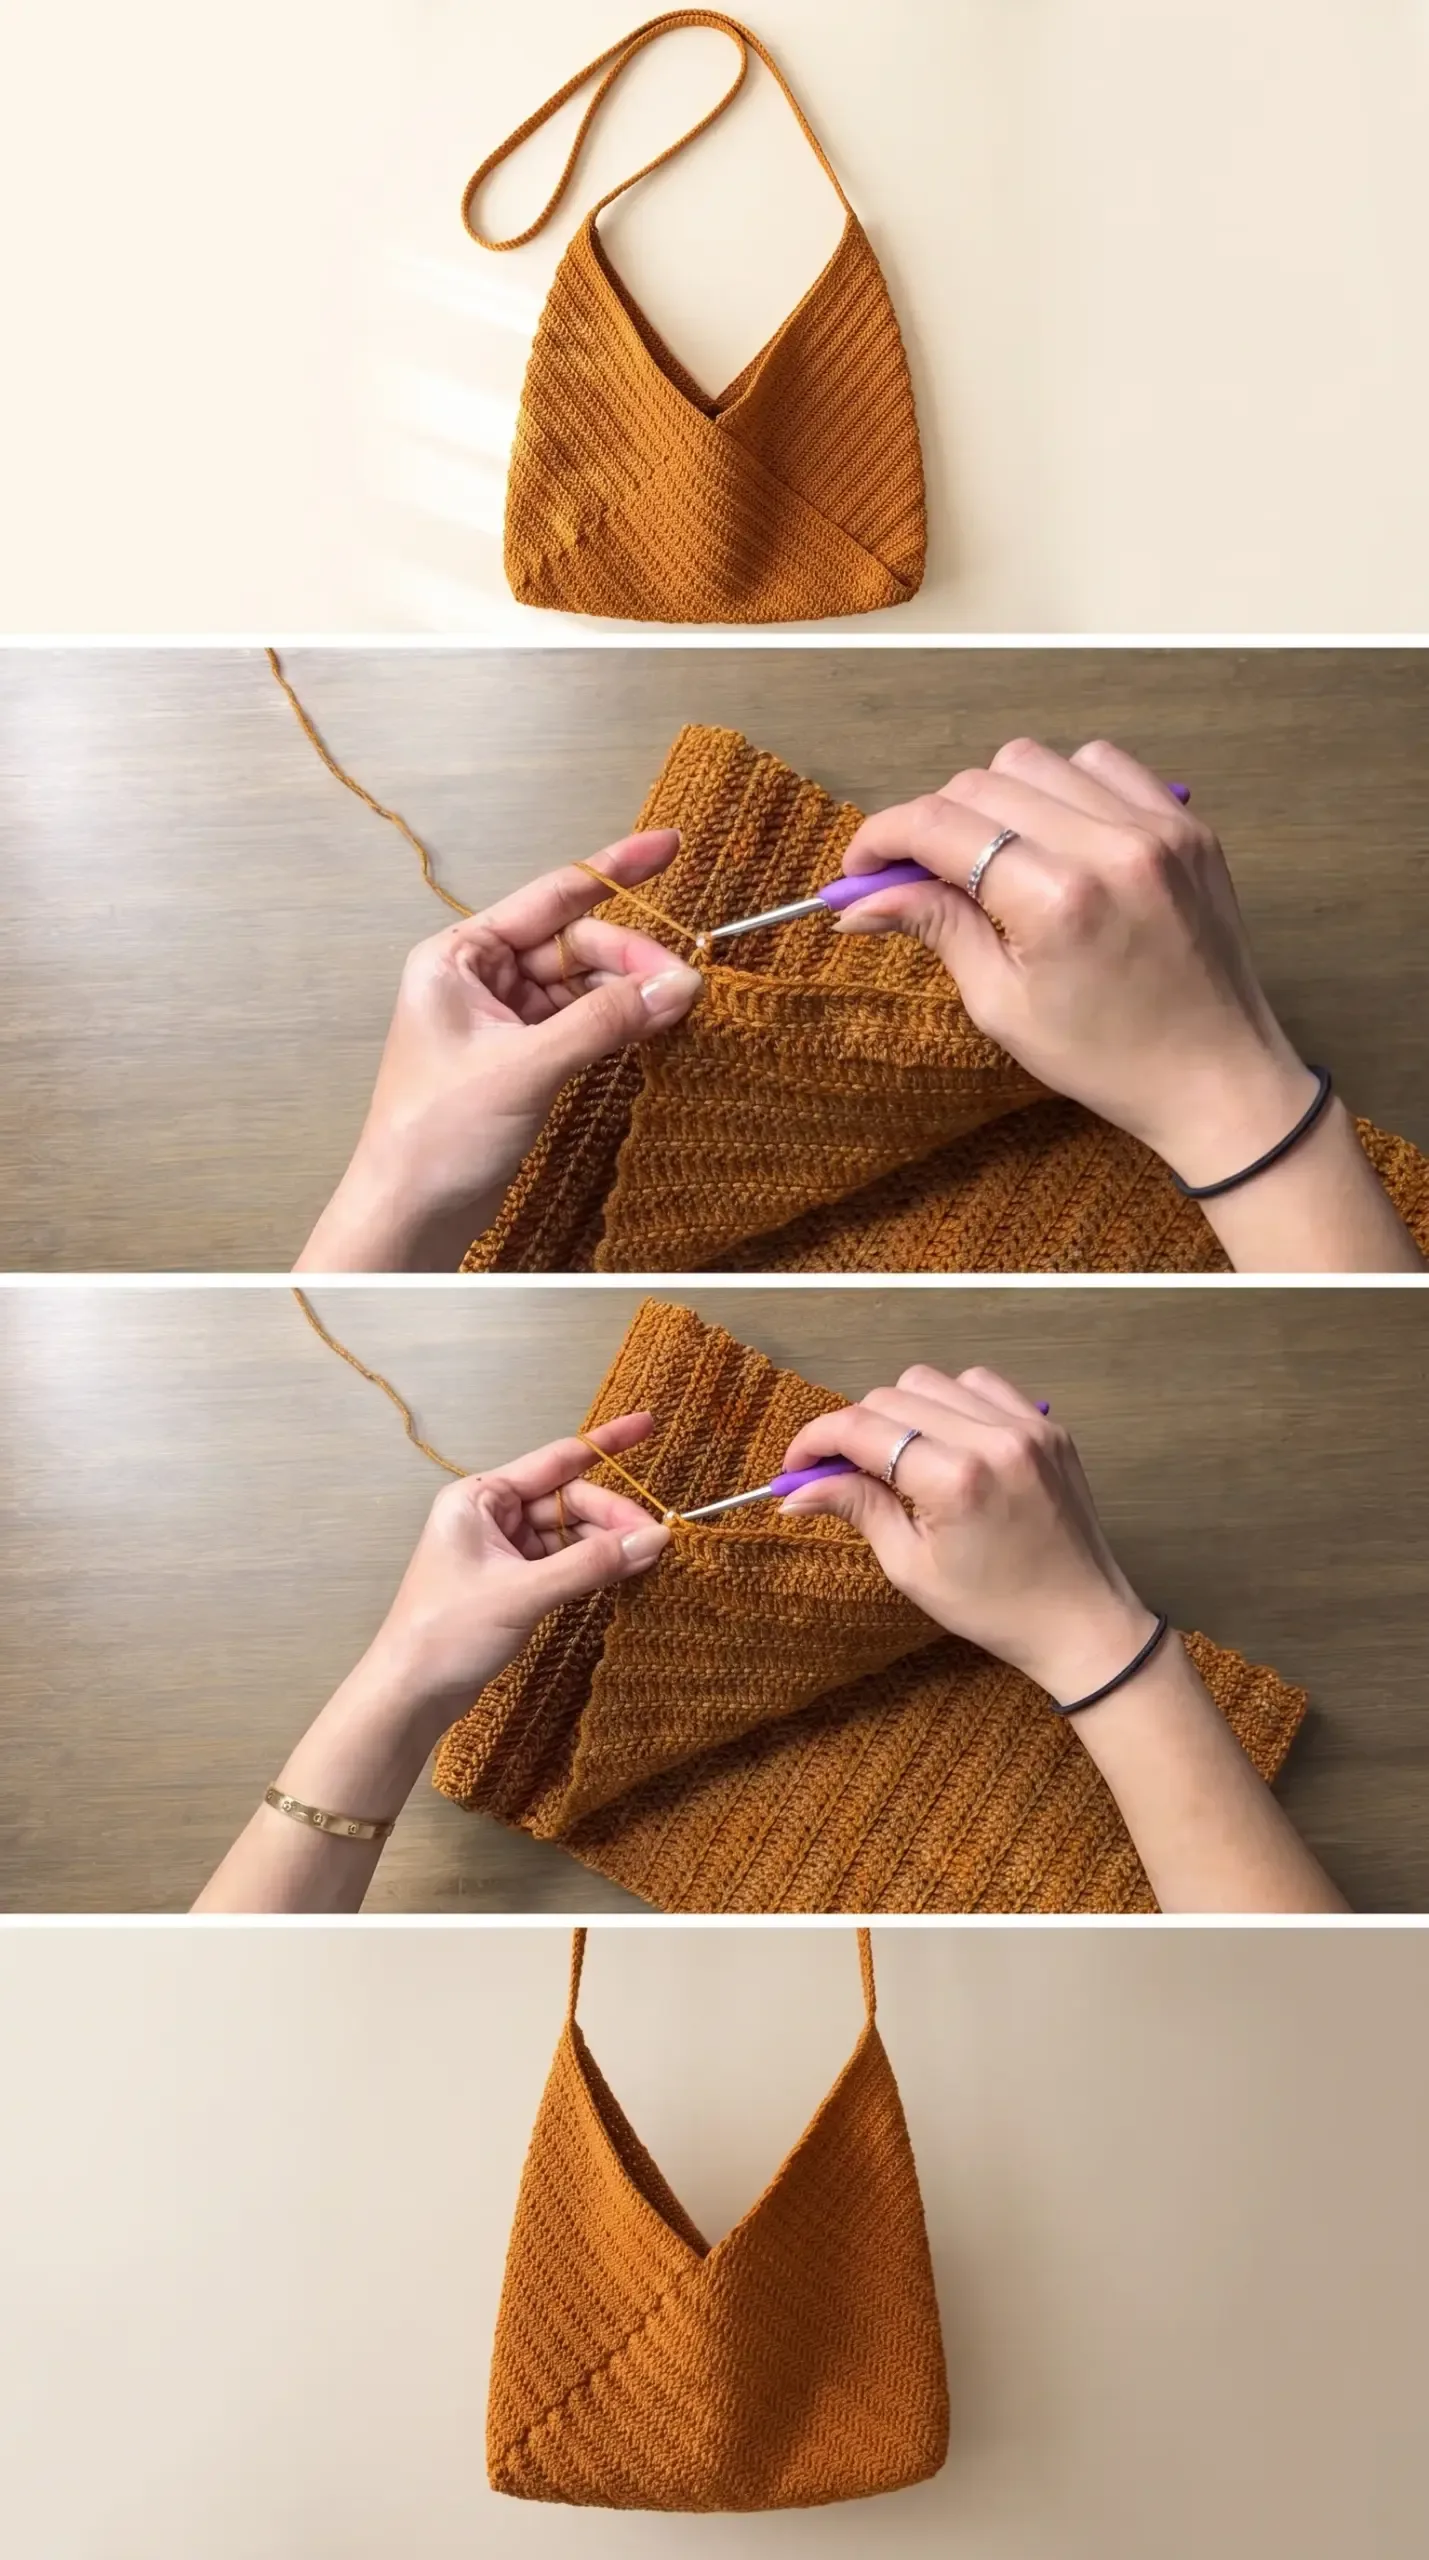
Stitch by Stitch
The Crochet Origami Bag relies on a small, satisfying handful of stitches that even a beginner can settle into quickly.
BULLET:CH (Chain) The foundation of the entire bag, used to start the flat panel and to construct the long shoulder strap.
BULLET:SC (Single Crochet) The primary stitch of the bag body, worked in rows to create a tight, even, airy yet structured fabric.
BULLET:SC2tog (Single Crochet Two Together) A simple decrease used to shape the triangular flap and give the bag its signature origami point.
BULLET:Slip Stitch Used at row ends and during seaming to join edges cleanly and invisibly.
Once you fall into the meditative rhythm of row after row of SC, the panel grows quickly and the construction almost tells you where to fold next.
Construction
The genius of the Crochet Origami Bag is that the entire body begins as one large flat rectangle worked in rows, and the bag takes shape entirely through folding and seaming rather than complex shaping as you go. The triangular front flap is shaped using SC2tog decreases worked gradually down one end of the panel, which creates that characteristic diagonal point you see draped across the front. Once your panel is complete, a few simple seams along the sides bring the bag to life in minutes, and the long chain shoulder strap is worked separately and attached at both upper corners. If you want a deeper bag for carrying more, simply add extra rows to your starting rectangle before beginning the decrease section.
Wearing Your Origami Bag
Wear your Crochet Origami Bag crossbody over a ribbed long-sleeve top and straight-leg jeans for that effortless everyday look, or let it rest on one shoulder over a slip dress for something a little softer. It holds a phone, a wallet, keys, and a small notebook without overstuffing, making it the ideal companion for a farmers market morning or a slow afternoon in a bookshop. Every time you reach for it, you will feel that particular quiet pride of carrying something you made with your own hands.
Keeping Your Origami Bag Looking Its Best
Because this bag is worked in cotton or a cotton blend, it responds beautifully to a gentle hand wash in cool water with a mild detergent. Reshape it carefully while damp by smoothing the flat panels and re-forming the origami fold, then lay it flat on a towel to dry away from direct sunlight. If you want the structure to feel even crisper and more defined after washing, a light blocking with rust-proof pins on a foam mat will sharpen every edge and seam. Store it flat or loosely stuffed with tissue paper to help it hold its shape between uses.
The full video tutorial for this Crochet Origami Bag walks you through every step from the first chain to the finished strap, so bookmark it and let yourself enjoy the making. If you craft yours, pin it to your crochet boards and tag it so the whole community can see what you have made.
Follow us on Pinterest and subscribe to the Newsletter so you don’t miss a thing!
Tutorial and photos of this origami bag by: VivCrochets.
