There’s something about a sunflower bag that just makes you smile. This navy blue sunflower granny square bag combines cheerful golden blooms with a deep navy background that makes those petals absolutely pop. The best part? If you can crochet a basic granny square and work in rows, you can absolutely make this bag.
I designed this tote with everyday use in mind. It is sturdy enough for farmers market trips, pretty enough for casual outings, and roomy enough to hold everything you actually need. The sunflower granny squares give it that handmade charm without being overly fussy. And that navy blue? It goes with practically everything.
Let me walk you through exactly how to make your own.
What Makes This Sunflower Granny Square Bag Special
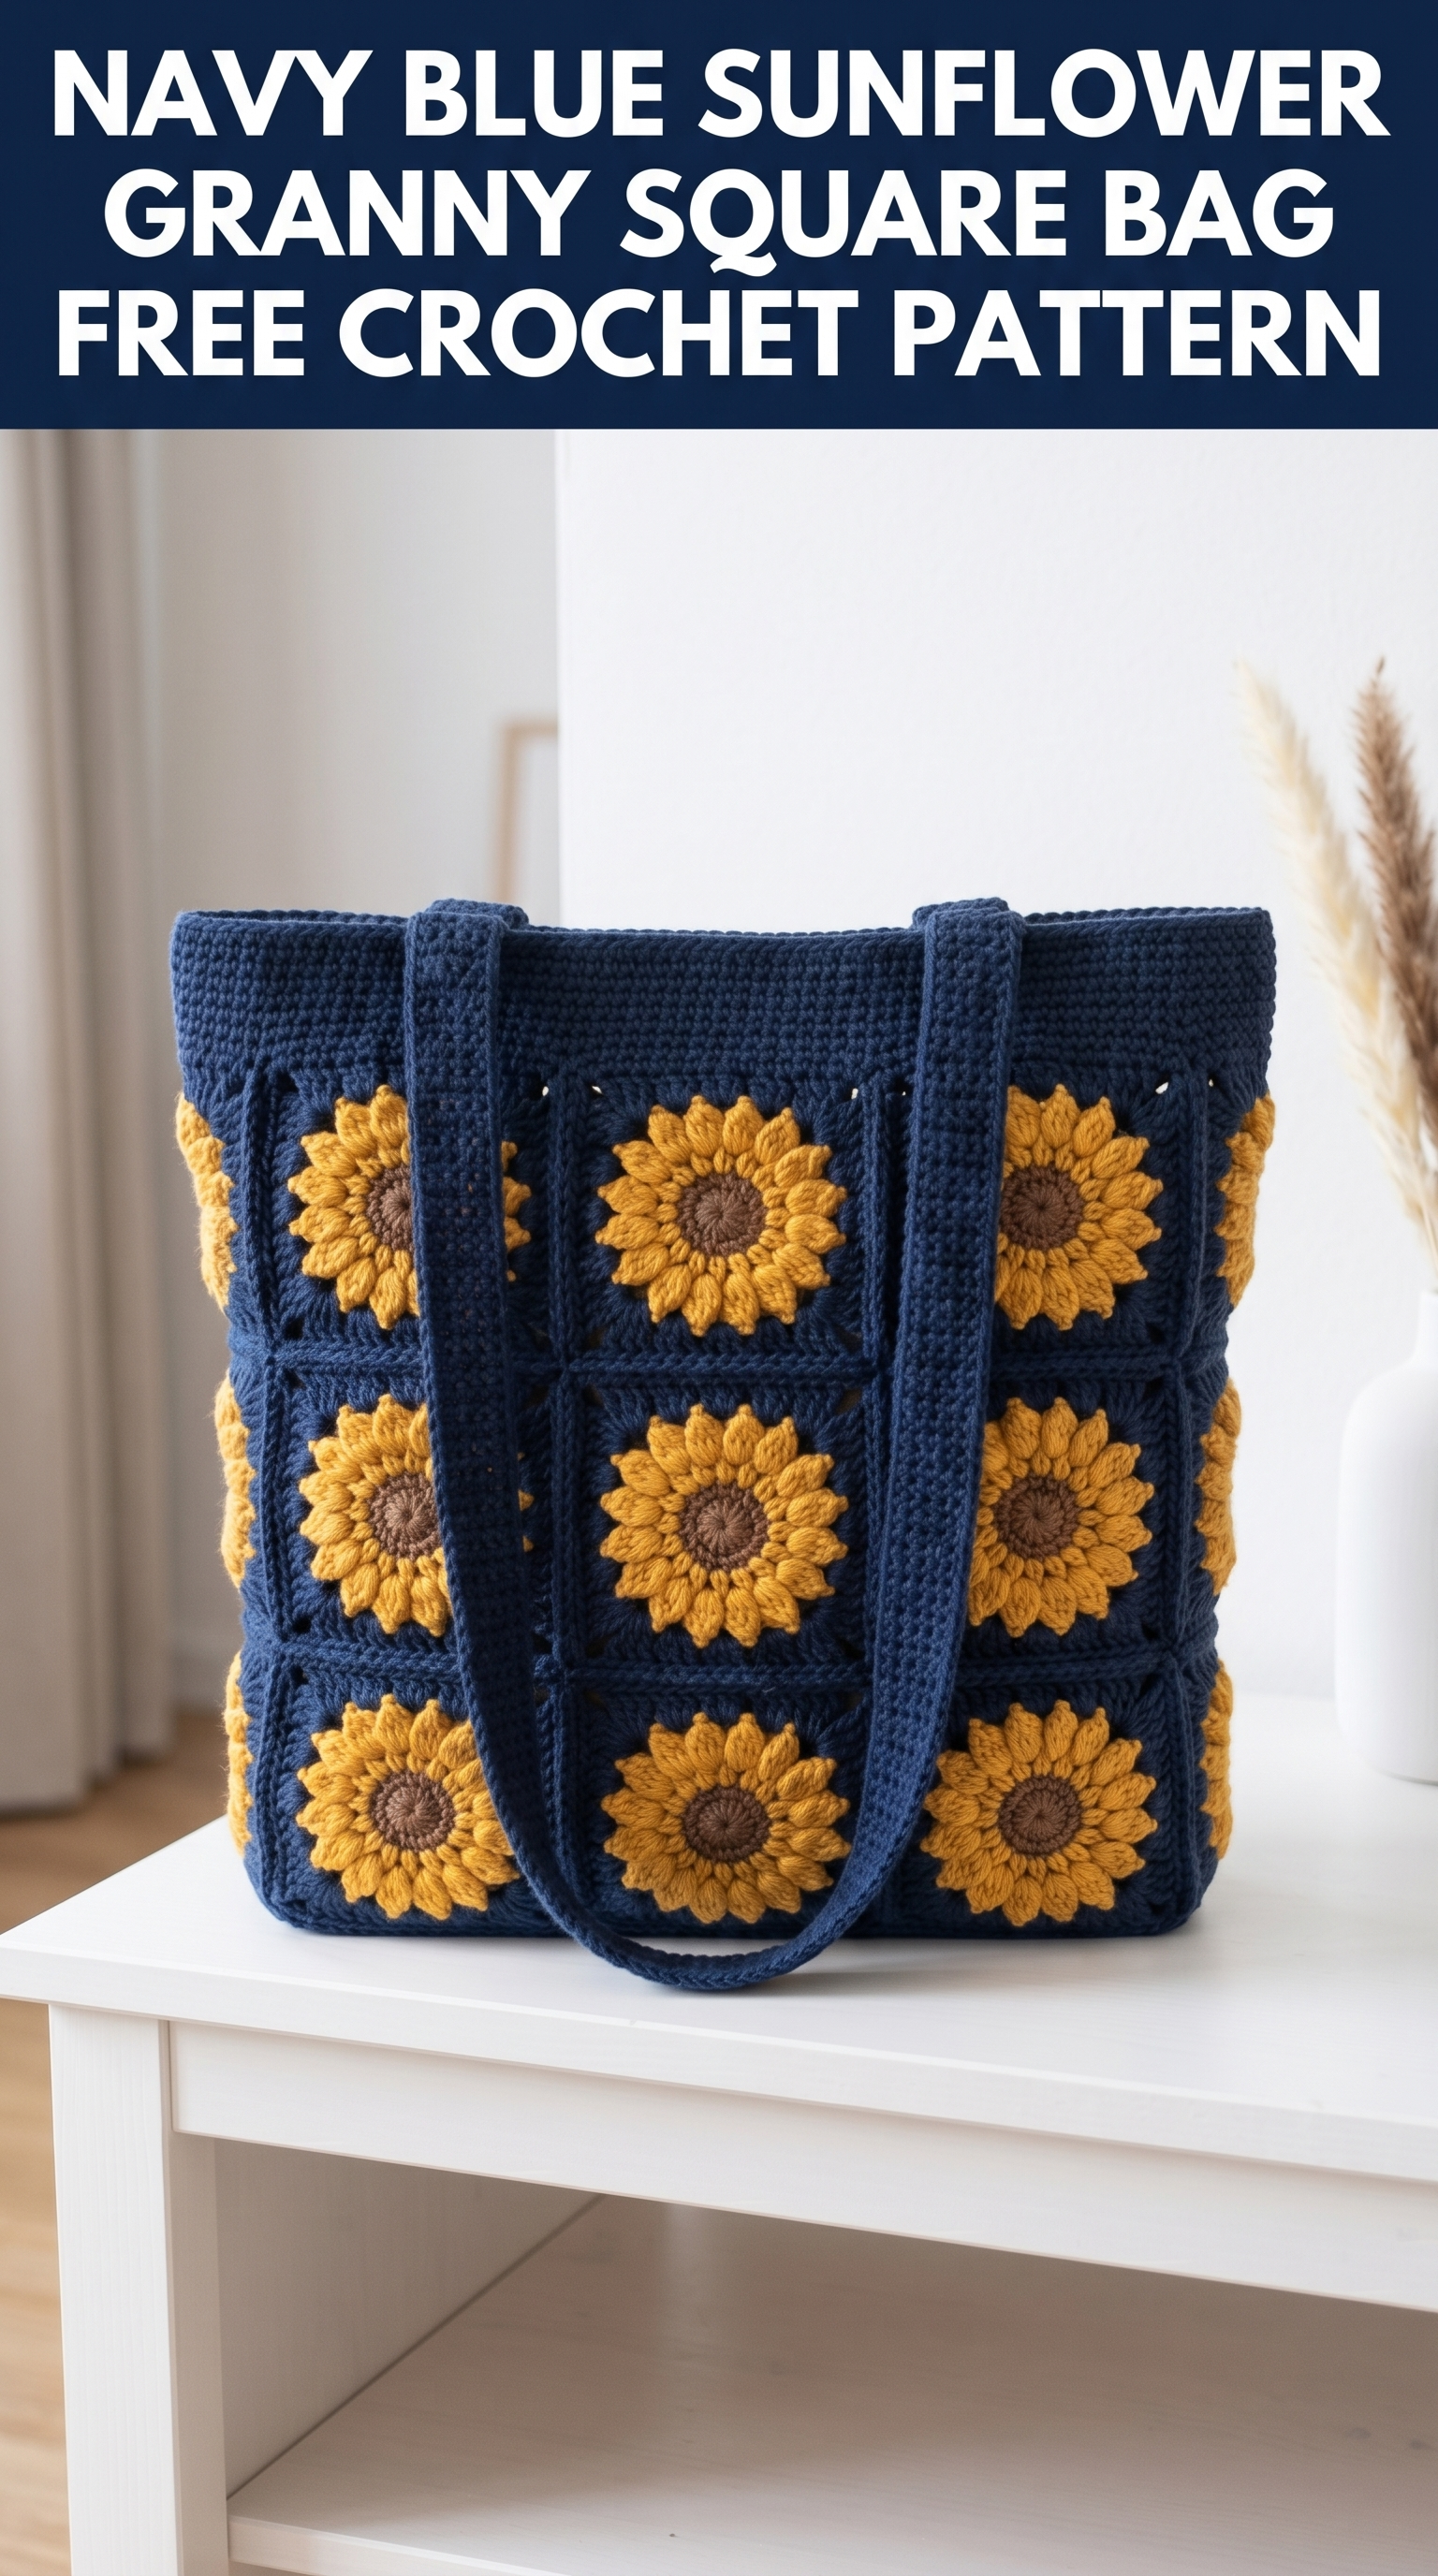
Looking at this finished bag, a few things stand out immediately. The construction uses 18 sunflower granny squares arranged in a 3×3 grid on each side panel. The deep navy blue border and joining create clean lines between the squares, giving the whole piece a polished, intentional look rather than a patchwork feel.
The sunflowers themselves feature three distinct colors: a brown center, golden yellow petals, and navy blue corners that frame each bloom perfectly. The petals appear to use a puff stitch technique that creates dimension and texture. This makes the flowers look realistic and gives them that lovely raised quality.
The handles are worked separately in solid navy, using what appears to be single crochet rows for durability. They are positioned to distribute weight evenly and sit comfortably on your shoulder.
Skill Level and Who This Pattern Is For
I would rate this sunflower bag pattern as intermediate level. Here is why.
You need to know how to work basic stitches confidently. You should be comfortable changing colors mid-round without your work looking messy. The puff stitch petals require a technique that might be new to some crocheters. And joining granny squares neatly takes a bit of practice.
That said, if you are an adventurous beginner who has made a few granny squares before, you can absolutely tackle this. Take it one square at a time. The repetition will build your skills as you go.
Materials You Will Need

Yarn
This bag uses worsted weight yarn (also called medium weight or #4 weight). Based on the finished look, I recommend 100% cotton or a cotton blend for structure and durability. Acrylic works too, but cotton holds its shape better for bags.
Color A (Brown): Approximately 50 yards for all centers
Color B (Golden Yellow): Approximately 200 yards for all petals
Color C (Navy Blue): Approximately 400 yards for borders, joining, and handles
I suggest yarns like Lily Sugar’n Cream, Paintbox Cotton DK, or Lion Brand 24/7 Cotton.
Hook
5.0mm (US H/8) crochet hook
Adjust if needed to match gauge. A slightly smaller hook creates a tighter fabric that prevents items from poking through.
Notions
Gauge
Each finished sunflower granny square should measure approximately 4.5 inches by 4.5 inches (11.5cm x 11.5cm) after blocking.
Work one square first. If yours is larger, go down a hook size. If smaller, go up a hook size. Consistent gauge matters for this project because all 18 squares need to match.
Abbreviations and Stitch Definitions
Let me define every stitch before we begin. I will use these abbreviations throughout the pattern.
ch = chain (wrap yarn over hook, pull through loop)
sl st = slip stitch (insert hook, yarn over, pull through both loops at once)
sc = single crochet (insert hook, yarn over, pull up loop, yarn over, pull through both loops)
dc = double crochet (yarn over, insert hook, yarn over, pull up loop, yarn over, pull through 2 loops, yarn over, pull through remaining 2 loops)
hdc = half double crochet (yarn over, insert hook, yarn over, pull up loop, yarn over, pull through all 3 loops)
puff st = puff stitch (yarn over, insert hook, pull up loop) repeat 3 times in same stitch, yarn over, pull through all 7 loops on hook, ch 1 to close
sk = skip
sp = space
st(s) = stitch(es)
Sunflower Granny Square Pattern
You will make 18 identical squares. Work them one at a time, or assembly-line style by completing all Round 1s first, then all Round 2s, and so on.
Round 1: Brown Center
With Color A (brown), create a magic ring.
Round 1: Ch 2 (does not count as stitch), work 8 hdc into magic ring. Sl st to first hdc to join. Pull magic ring closed. (8 hdc)
Fasten off Color A. Weave in the tail now while the center is easy to access.
*Tip: If magic rings intimidate you, ch 4 and sl st to first ch to form a ring instead. Work your 8 hdc into the center of that ring.*
Round 2: First Petal Round
Join Color B (golden yellow) in any stitch.
Round 2: Ch 1, (sc, puff st, sc) in same st, (sc, puff st, sc) in each st around. Sl st to first sc to join. (8 petals, 24 sts total)
Do not fasten off. Continue with Color B.
*Note: The puff stitches create the raised petals. If your puffs look flat, try pulling up taller loops when you work each yarn over.*
Round 3: Second Petal Round
Round 3: Ch 1, working behind the petals from Round 2, sc in the back loop of each hdc from Round 1, placing (sc, puff st, ch 1, puff st, sc) between each petal. Sl st to first sc to join. (8 larger petals)
Fasten off Color B.
*This round is a bit tricky. You are working into the back bumps of Round 1 to anchor these larger petals behind the first petal layer. Take your time.*
Round 4: Navy Border Begin
Join Color C (navy blue) in any ch-1 space between petals.
Round 4: Ch 3 (counts as dc), 2 dc in same sp, ch 2, \*3 dc in next ch-1 sp, ch 2\*, repeat around. Sl st to top of ch-3 to join. (8 groups of 3 dc, 8 ch-2 spaces)
Round 5: Square Corners
Round 5: Sl st to ch-2 sp. Ch 3, (2 dc, ch 2, 3 dc) in same sp for corner, ch 1, 3 dc in next ch-2 sp, ch 1, \*(3 dc, ch 2, 3 dc) in next ch-2 sp for corner, ch 1, 3 dc in next ch-2 sp, ch 1\*, repeat around. Sl st to top of ch-3 to join.
You now have 4 corners and 4 sides.
Round 6: Final Border
Round 6: Sl st to corner ch-2 sp. Ch 3, (2 dc, ch 2, 3 dc) in same sp, \*ch 1, 3 dc in next ch-1 sp, ch 1, 3 dc in next ch-1 sp, ch 1, (3 dc, ch 2, 3 dc) in corner sp\*, repeat around. Sl st to join. (4 corners, 3 shell groups per side)
Fasten off. Weave in ends.
Finished square: approximately 4.5 inches
Repeat 17 more times for 18 total squares.
Assembling the Bag
Laying Out Your Squares
Arrange squares in two panels of 9 squares each (3 wide by 3 tall). Make sure all sunflowers face the same direction.
Joining Method
I recommend a slip stitch join worked through both loops for durability. You can also use a whip stitch or single crochet join if you prefer.
To slip stitch join:
Hold two squares with wrong sides together. With Color C, insert hook through both corner ch-2 spaces. Pull up loop. \*Insert hook through next stitch on both squares, yarn over, pull through all loops\*. Continue across edge. Fasten off.
Join squares into rows of 3 first. Then join rows together to create each 3×3 panel.
Joining Front and Back Panels
Place both panels wrong sides together. Using Color C, slip stitch join around three sides (bottom and both sides), leaving the top open.
Bottom Reinforcement (Optional)
For extra structure, work 2 to 3 rows of single crochet along the inside bottom seam. This prevents sagging when the bag is full.
Top Border
Round 1: Join Color C at any corner. Ch 1, sc evenly around top opening. Sl st to join. (approximately 72 sc)
Rounds 2 to 4: Ch 1, sc in each sc around. Sl st to join.
Fasten off.
Handles (Make 2)
With Color C, ch 61.
Row 1: Sc in 2nd ch from hook and each ch across. (60 sc)
Rows 2 to 5: Ch 1, turn, sc in each sc across. (60 sc)
Fasten off, leaving a long tail for sewing.
Attaching Handles
Position each handle about 3 squares from the side edges. Pin in place. Using tapestry needle and yarn tail, whip stitch handles securely to inside top border. Reinforce attachment points by sewing over them twice.
Finishing Your Sunflower Bag
Weave in all remaining ends. Block your bag gently with steam or wet blocking if needed to even out the squares.
For added structure, consider adding a fabric lining. A simple rectangular lining sewn to the inside prevents stretching and adds a polished look.
Customization Ideas
Want to make this sunflower granny square bag your own? Here are some ideas.
Change the background color. Cream, sage green, or burgundy would all look beautiful behind those golden blooms.
Add a button closure. Crochet a small loop at the center top and sew on a statement button.
Make it bigger. Use 4×4 granny square panels instead of 3×3 for a larger tote.
Create a crossbody version. Replace the two handles with one long strap.
Troubleshooting Common Issues
Petals look flat: Pull up taller loops when creating your puff stitches. The height creates the puff.
Squares are different sizes: Check your tension. When changing colors, your gauge might shift. Block all squares before joining.
Bag stretches out of shape: Use cotton yarn rather than acrylic. Add a fabric lining. Avoid overfilling.
Joining looks uneven: Practice your join method on scrap squares first. Keep consistent tension.
Care Instructions
Hand wash in cool water with mild detergent. Reshape and lay flat to dry. Cotton may shrink slightly in hot water, so cool temperatures are best.
If lined with fabric, spot clean only or remove lining before washing.
Final Thoughts on This Crochet Pattern
This navy blue sunflower granny square bag is one of those projects that looks impressive but builds on techniques you probably already know. The sunflower motif brings so much joy, and the navy background keeps it wearable for everyday use.
I hope this step by step crochet tutorial gives you everything you need to make your own. Take your time with those puff stitch petals. They are worth the extra effort.
Thank you so much for choosing to make this with me. I genuinely love seeing what you create. If you finish your sunflower bag, please tag me on Instagram or share a photo in my Facebook group. Nothing makes my day like seeing your beautiful work out in the world.
Happy crocheting, friend. You have got this.
