There is something absolutely magical about crocheting tiny garments. This daisy flower baby pinafore dress is one of those projects that looks incredibly impressive but is genuinely achievable for confident beginners. The moment you see those sweet scalloped edges and cheerful daisy appliqués come together, you will understand why I fell in love with this design.
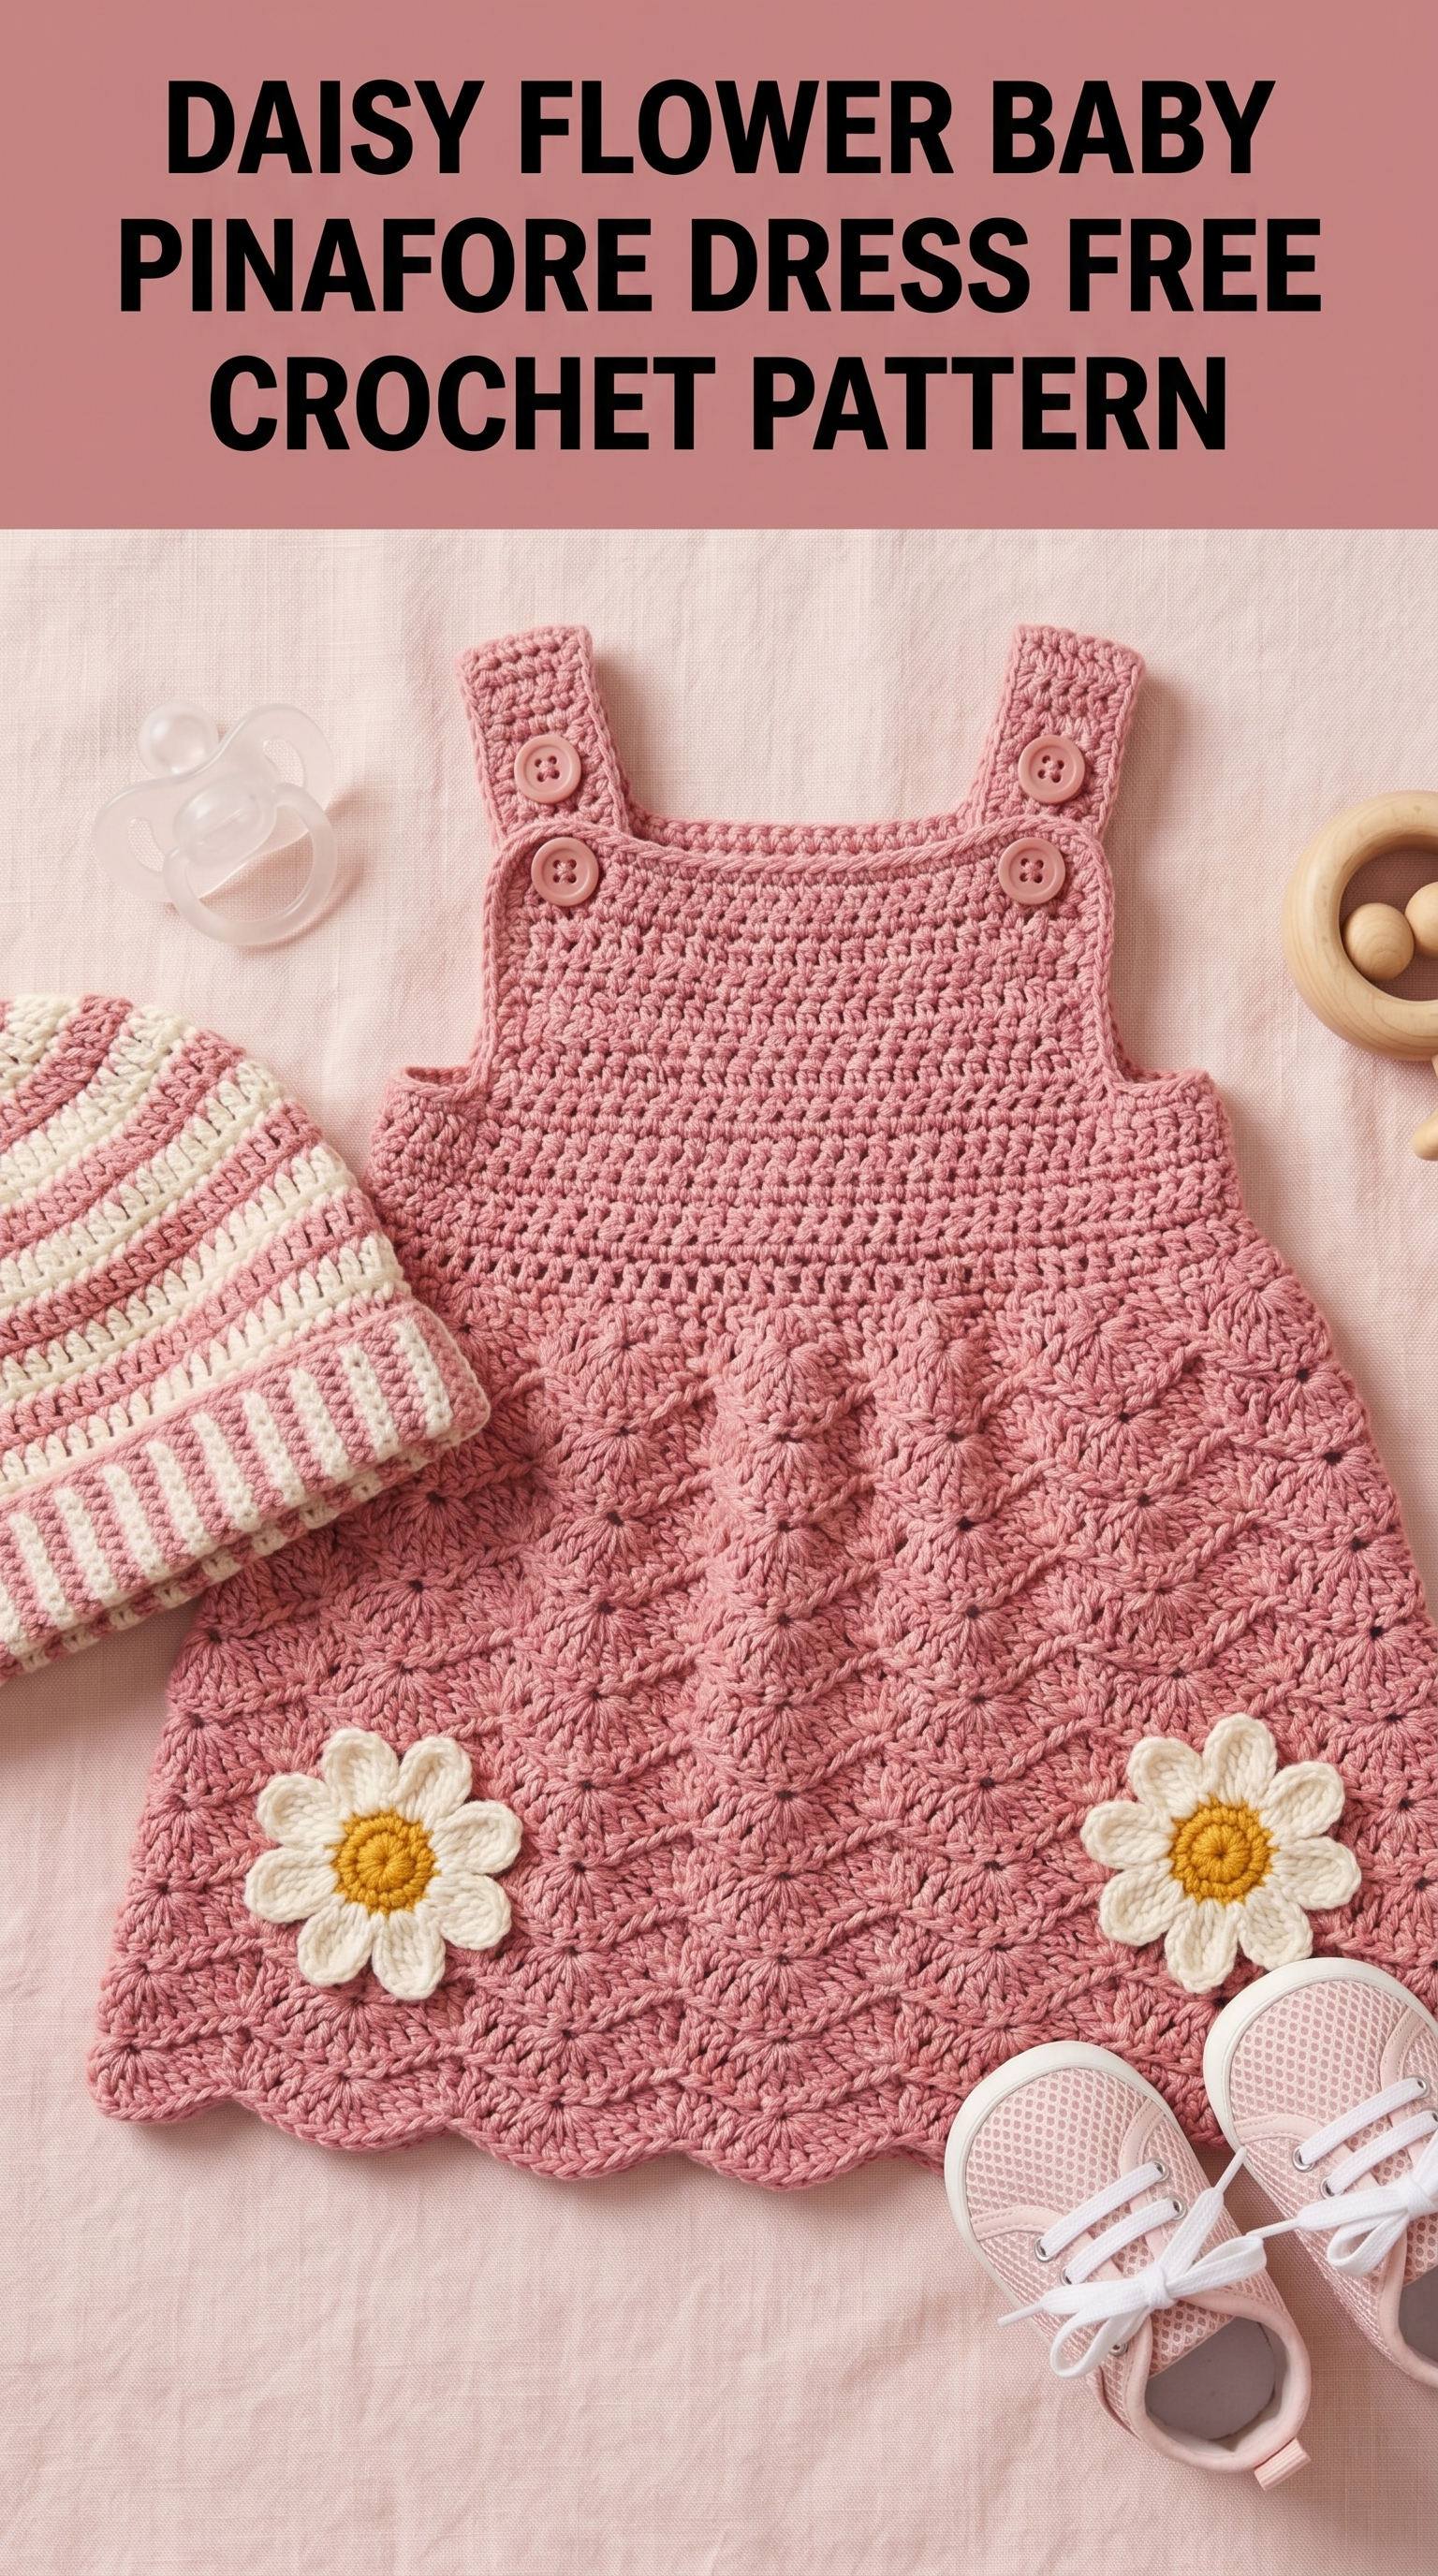
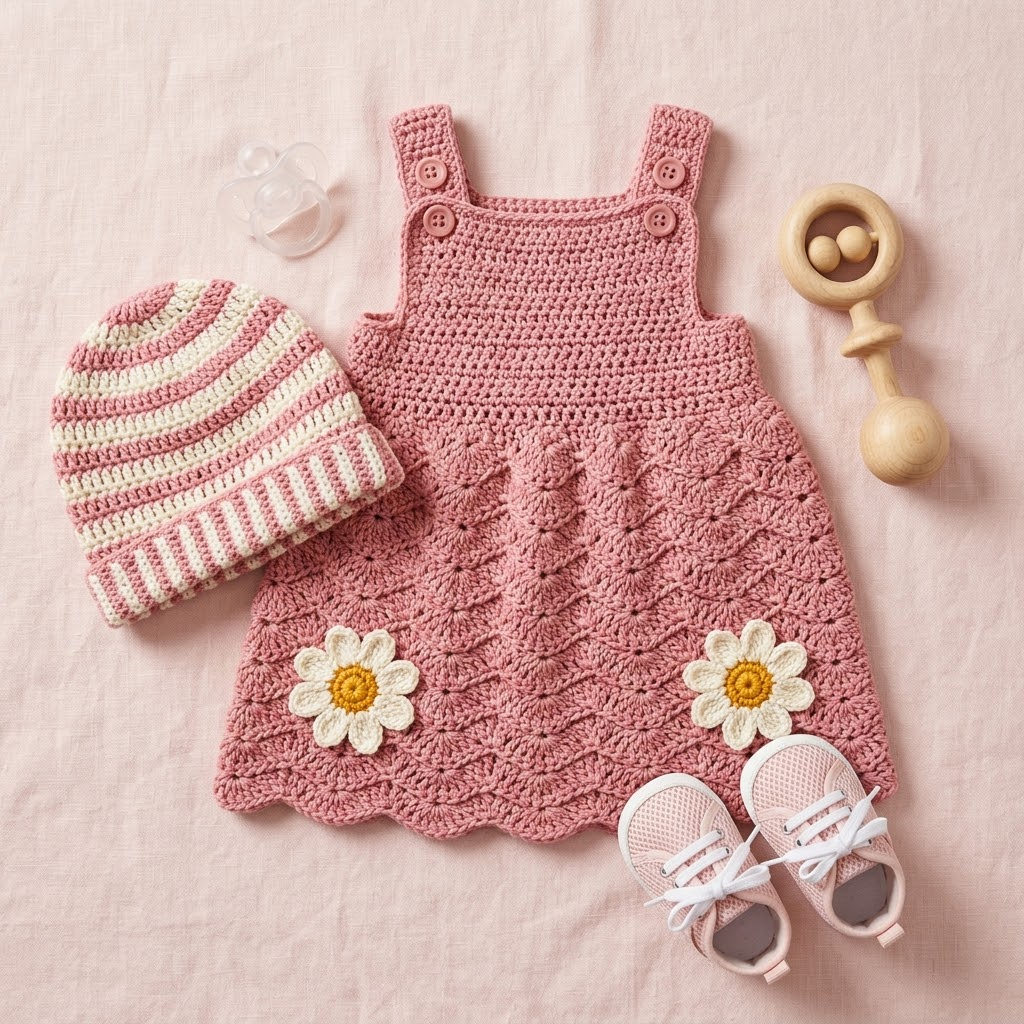
This crochet pattern combines a simple shell stitch skirt with a straightforward bodice. The matching striped beanie takes this set from adorable to unforgettable. Whether you are making this for your own little one, a baby shower gift, or just because tiny clothes are irresistible, I am here to walk you through every single step.
Let me be honest with you. If you can work basic stitches and count reliably, you can absolutely make this dress. The shell stitch creates that gorgeous texture on the skirt, and once you get the rhythm, it practically works itself.
Why This Baby Pinafore Dress Crochet Pattern Works So Well
The construction of this pinafore dress is clever. You start at the bottom hem with those beautiful scalloped shells and work your way up to a fitted bodice. The straps attach with buttons, which means easy diaper changes and room to adjust the fit as baby grows.
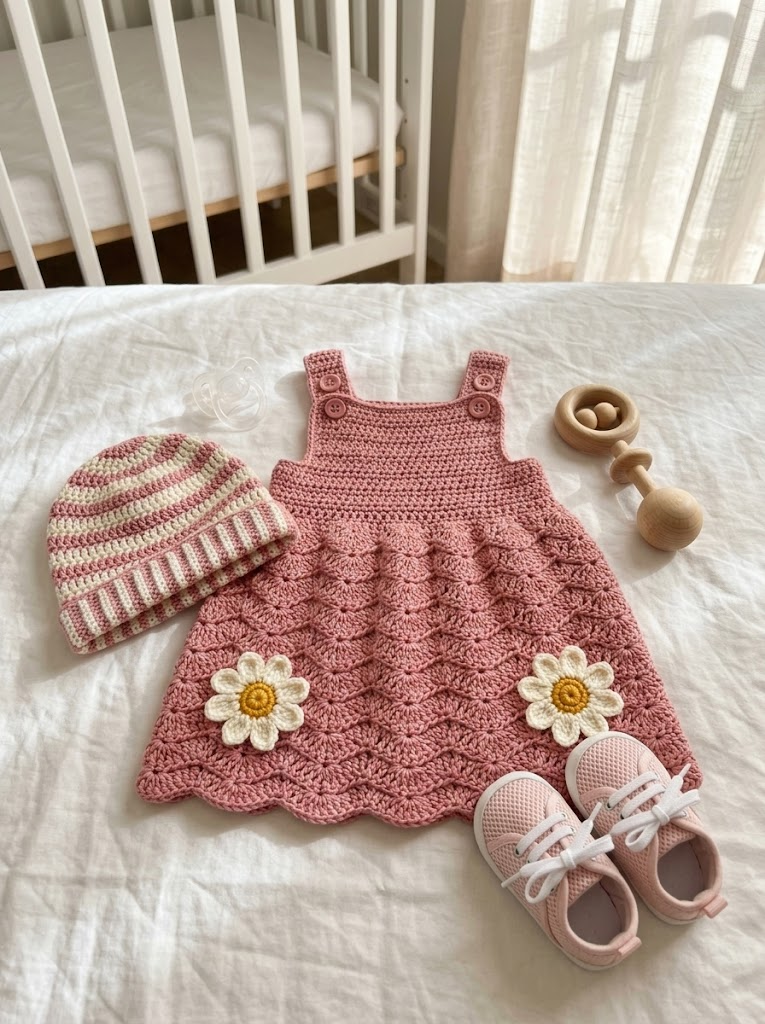
The shell stitch creates natural waves that give the skirt its lovely drape and movement. It also means the fabric has some stretch and breathability, perfect for layering over onesies in any season.
That dusty rose pink is classic and gender neutral enough to work for any baby. But imagine this in soft mint, butter yellow, or even a bold coral. The daisy appliqués pop beautifully against any base color.
Materials You Will Need
Gathering your supplies before you start makes the whole process smoother. Here is everything required for the complete set.
For the Pinafore Dress:
For the Matching Striped Beanie:
Gauge: 16 stitches and 8 rows equals 4 inches in double crochet using 4.0mm hook. Always check your gauge before starting.
Stitch Abbreviations and Definitions
Let me break down every stitch you will use. If any of these are new to you, practice them on a small swatch first.
Ch = Chain. Wrap yarn over hook, pull through loop on hook. This creates your foundation.
Sl st = Slip stitch. Insert hook, yarn over, pull through stitch and loop on hook in one motion. Used for joining rounds.
Sc = Single crochet. Insert hook into stitch, yarn over and pull up a loop (two loops on hook), yarn over and pull through both loops.
Hdc = Half double crochet. Yarn over, insert hook into stitch, yarn over and pull up a loop (three loops on hook), yarn over and pull through all three loops.
Dc = Double crochet. Yarn over, insert hook into stitch, yarn over and pull up a loop (three loops on hook), yarn over and pull through two loops, yarn over and pull through remaining two loops.
Shell = Work 5 dc into the same stitch. This creates a fan shape.
Skip = Miss the indicated number of stitches without working into them.
St(s) = Stitch or stitches.
Size Information
This step by step crochet tutorial is written for size 0 to 6 months. Finished dress measurements are approximately 14 inches chest circumference and 12 inches length from shoulder to hem.
To adjust sizing, add or subtract shell repeats in multiples of 6 chains for the foundation. Each additional repeat adds roughly 1.5 inches to the width.
Daisy Flower Baby Pinafore Dress Pattern Instructions
Take a deep breath. We are going to work this from the bottom up, which means you get to start with the fun textured part right away.
Skirt Section
Foundation Row: Ch 90. (For larger sizes, chain in multiples of 6 plus 6.)
Row 1: Sc in 2nd ch from hook and in each ch across. Turn. (89 sc)
Row 2 (Shell Setup): Ch 3 (counts as first dc here and throughout), dc in same st, skip 2 sts, sc in next st, *skip 2 sts, shell in next st, skip 2 sts, sc in next st* repeat from * to * across to last 3 sts, skip 2 sts, 2 dc in last st. Turn. (14 shells, 15 sc, 2 half shells)
Row 3: Ch 1, sc in first dc, *shell in next sc, sc in center dc of next shell* repeat from * to * across, ending with sc in top of turning ch. Turn.
Row 4: Ch 3, 2 dc in first sc, *sc in center dc of next shell, shell in next sc* repeat from * to * across, ending with sc in center dc of last shell, 3 dc in last sc. Turn.
Rows 5 through 14: Repeat Rows 3 and 4 five more times. Your skirt should measure approximately 6 inches from the foundation edge.
Here is where things shift. Do not worry, the transition to the bodice is simpler than it looks.
Waist Decrease Section
Row 15: Ch 1, sc in each st across, working 1 sc in each dc and 1 sc in each sc. Turn. (89 sc)
Row 16: Ch 1, sc in first st, *sc2tog over next 2 sts, sc in next 3 sts* repeat from * to * across, adjusting final repeat as needed. Turn. (approximately 72 sc)
The sc2tog (single crochet two together) is your decrease stitch. Insert hook in first stitch, pull up a loop, insert hook in next stitch, pull up a loop (three loops on hook), yarn over and pull through all three. This joins two stitches into one.
Row 17: Ch 1, sc in each st across. Turn. (72 sc)
Bodice Section
Now we create the fitted upper portion with simple rows of basic stitches.
Row 18: Ch 1, sc in first 18 sts. Leave remaining sts unworked for now. Turn. (18 sc) This is your first front panel.
Rows 19 through 24: Ch 1, sc in each st across. Turn. (18 sc)
Row 25 (Strap): Ch 1, sc in first 6 sts. Leave remaining sts unworked. Turn. (6 sc)
Rows 26 through 35: Ch 1, sc in each st across. Turn. (6 sc)
Fasten off and weave in end.
Rejoin yarn to work the second strap on the same front panel.
Row 25B: Skip center 6 sts of Row 24, join yarn in next st, ch 1, sc in same st and next 5 sts. Turn. (6 sc)
Rows 26B through 35B: Ch 1, sc in each st across. Turn. (6 sc)
Fasten off.
Back Bodice Panel
Return to Row 17. Skip 18 sts from the first front panel (this creates the armhole), join yarn in next st.
Row 18 (Back): Ch 1, sc in same st and next 35 sts. Leave remaining sts unworked. Turn. (36 sc)
Rows 19 through 24: Ch 1, sc in each st across. Turn. (36 sc)
Row 25 (First Back Strap): Ch 1, sc in first 6 sts. Leave remaining sts unworked. Turn. (6 sc)
Rows 26 through 35: Ch 1, sc in each st across. Turn. (6 sc)
Fasten off.
Rejoin yarn to work second back strap.
Row 25B (Second Back Strap): Skip center 24 sts of Row 24, join yarn in next st, ch 1, sc in same st and next 5 sts. Turn. (6 sc)
Rows 26B through 35B: Ch 1, sc in each st across. Turn. (6 sc)
Fasten off.
Second Front Panel
Return to Row 17. Skip the back section stitches (another armhole), join yarn in next st.
Row 18 (Second Front): Ch 1, sc in same st and remaining 17 sts. Turn. (18 sc)
Complete this front panel and its two straps exactly as you did the first front panel, following Rows 19 through 35.
Finishing the Dress
Seaming
With yarn needle and matching yarn, sew side seams from underarm to waist on both sides. Use a whip stitch or mattress stitch for a neat finish.
Button Loops
On each front strap end, work a small button loop. Join yarn at corner, ch 8, sl st to opposite corner of same strap end. Fasten off. Repeat for second front strap.
Attaching Buttons
Sew buttons to back strap ends, positioned to align with button loops. Test the fit and adjust button placement if needed.
Daisy Appliqué Pattern
These cheerful daisies are the perfect finishing touch. Make two for the dress hem.
Center (Yellow): With 3.5mm hook and yellow yarn, make a magic ring. Ch 1, work 6 sc into ring. Sl st to first sc to join. Pull ring closed. (6 sc)
Petals (Cream): Change to cream yarn. *Ch 4, sl st in 2nd ch from hook, hdc in next ch, dc in next ch, sl st in next st of center* repeat from * around. You will have 6 petals. Fasten off, leaving a tail for sewing.
Attach daisies to lower portion of skirt front, spacing evenly. Sew through center and tack down a few petals for security.
Matching Striped Beanie Pattern
This beanie uses simple color changes to create those sweet stripes.
With pink yarn, make a magic ring.
Round 1: Ch 3 (counts as dc), 11 dc into ring. Sl st to top of ch 3 to join. (12 dc)
Round 2: Ch 3, dc in same st, 2 dc in each st around. Sl st to join. (24 dc)
Round 3: Change to cream. Ch 3, dc in same st, dc in next st, *2 dc in next st, dc in next st* repeat around. Sl st to join. (36 dc)
Round 4: Change to pink. Ch 3, dc in same st, dc in next 2 sts, *2 dc in next st, dc in next 2 sts* repeat around. Sl st to join. (48 dc)
Round 5: Change to cream. Ch 3, dc in each st around. Sl st to join. (48 dc)
Rounds 6 through 12: Continue alternating colors every round, working even (no increases). (48 dc per round)
Ribbed Brim:
Round 13: Change to cream. Ch 1, sc in each st around. Sl st to join. (48 sc)
Rounds 14 through 17: Working in back loops only, ch 1, sc in each st around. Sl st to join. (48 sc)
Fasten off and weave in all ends.
Helpful Tips for Success
Counting matters. After each row, count your stitches. Shells can be tricky because they contain multiple stitches. Mark the center stitch of each shell with a removable marker if that helps you stay on track.
Block your finished pieces. Wet blocking or steam blocking will even out your stitches and help the shells lie flat. Pin the scalloped edge to preserve that wavy shape.
Yarn substitutions work fine. Any worsted weight yarn will create similar results. For warmer weather, try a cotton blend. For extra softness against baby skin, look for yarns labeled specifically for baby projects.
The bodice looks complicated but is not. You are essentially making three rectangles (two front panels and one back panel) with straps. Think of it as flat pieces that get seamed together.
Wrapping Up Your Daisy Flower Baby Pinafore Dress
You did it. Or you are about to do it. Either way, I am proud of you for tackling this project.
This baby pinafore dress crochet pattern creates something truly special. The combination of textured shell stitches, sweet daisy details, and that coordinating striped beanie makes a gift set that will be treasured. Every stitch you put into this carries love with it.
When you finish your dress, I would absolutely love to see it. Share your photos on Instagram or Facebook and tag me so I can celebrate your gorgeous work. Seeing your creations honestly makes my whole day brighter.
Thank you for trusting me to guide you through this crochet tutorial. Happy hooking, friend. You have got this.
